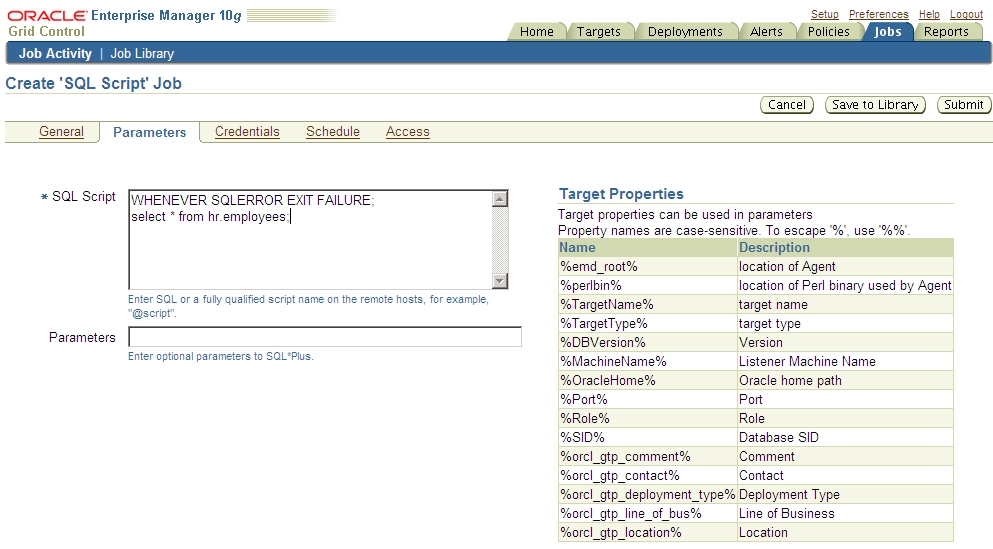
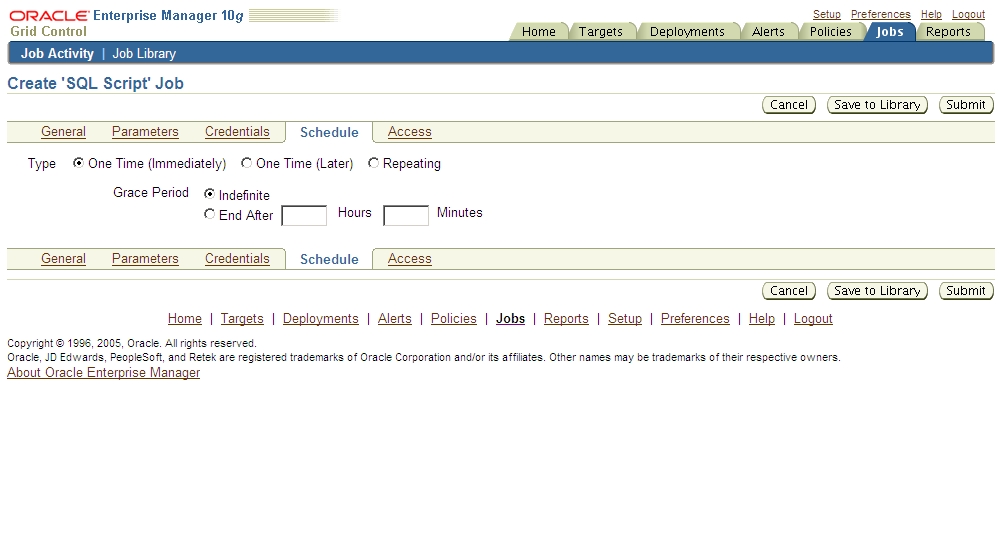
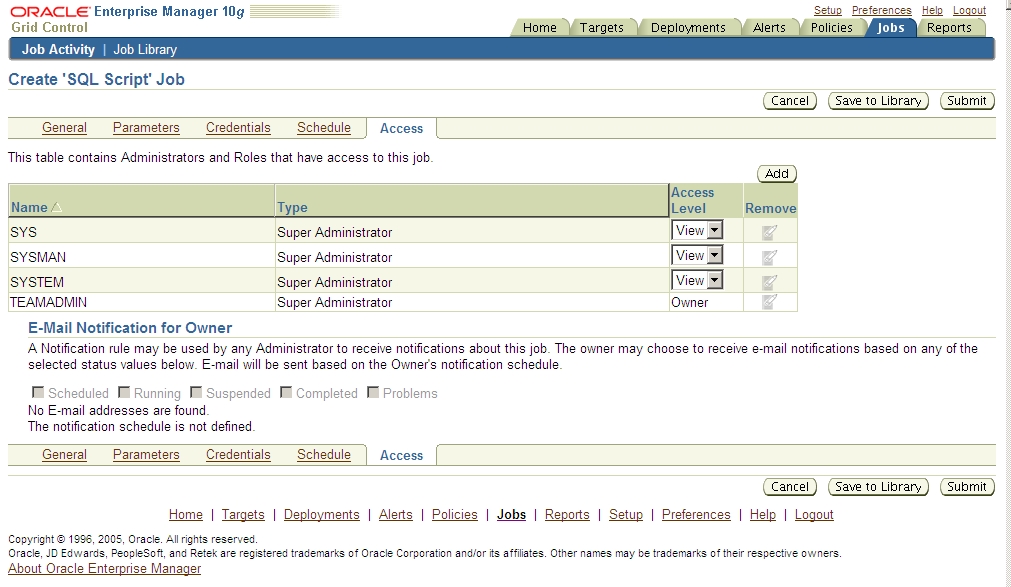
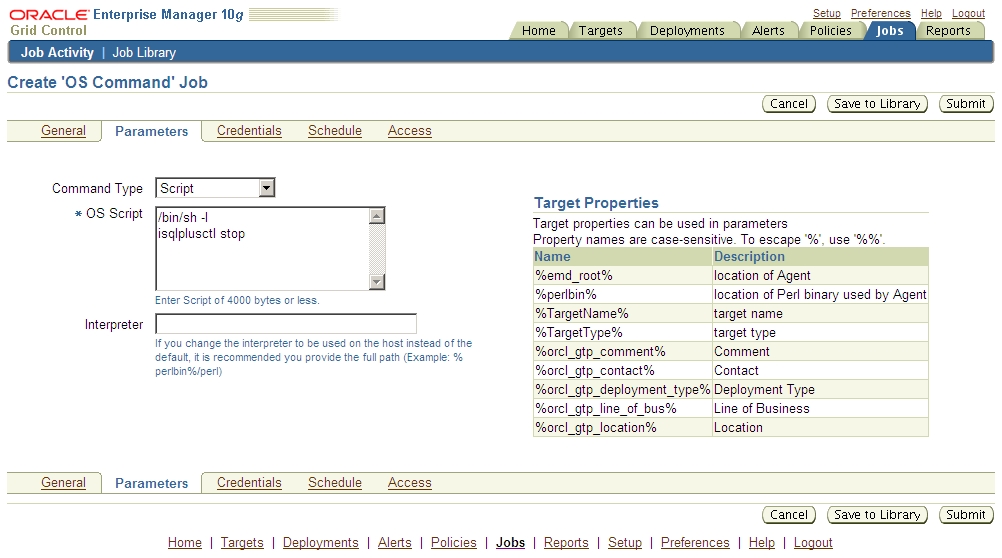
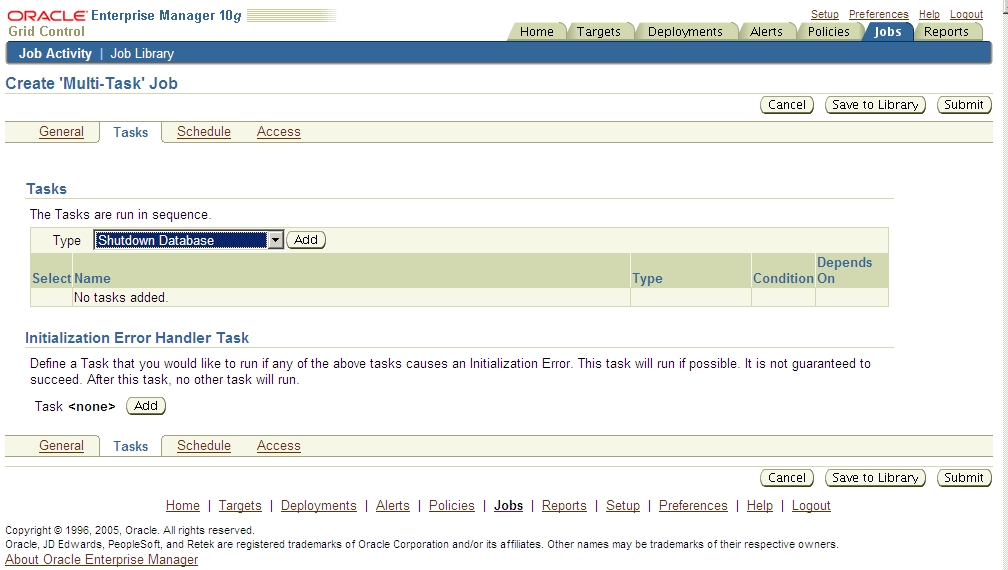
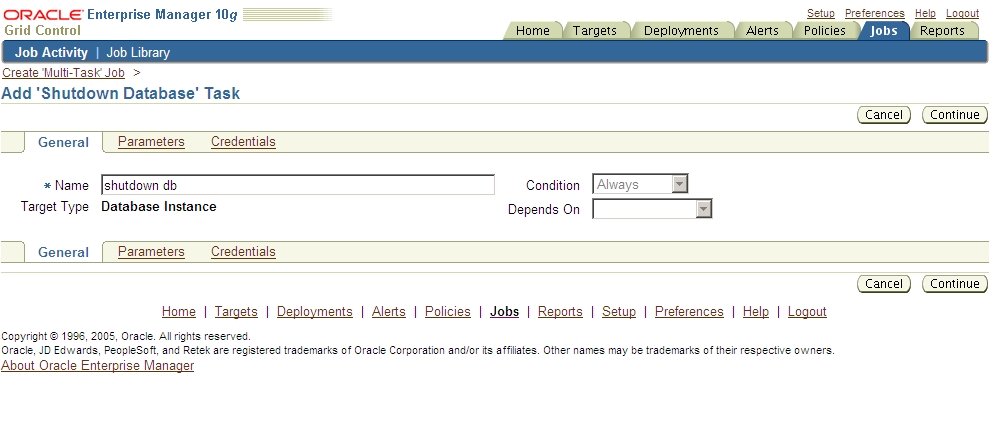
grid control中的job system在gc界面中首页的job菜单中,这个job可以建立很多类型的job,用途远远大于db control中的job或者schedual,在这里我们简单模拟几个常用的job的建立。(注意本文多图杀猫)
一、写在前面:
1、gc的登录用户,不能用一般的create user来建立,要用mgmt_user包来建立,但是更好的方式,是用gc界面中的setup-Administrators来建立:
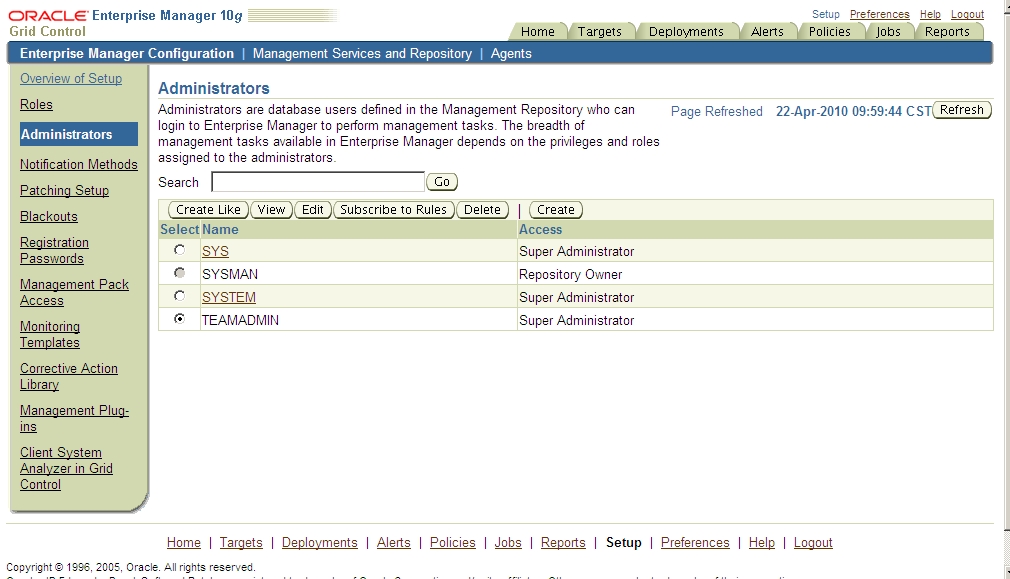
否则,用create user方式建立的用户,哪怕给了dba、sysdba权限,登录gc时会报错:
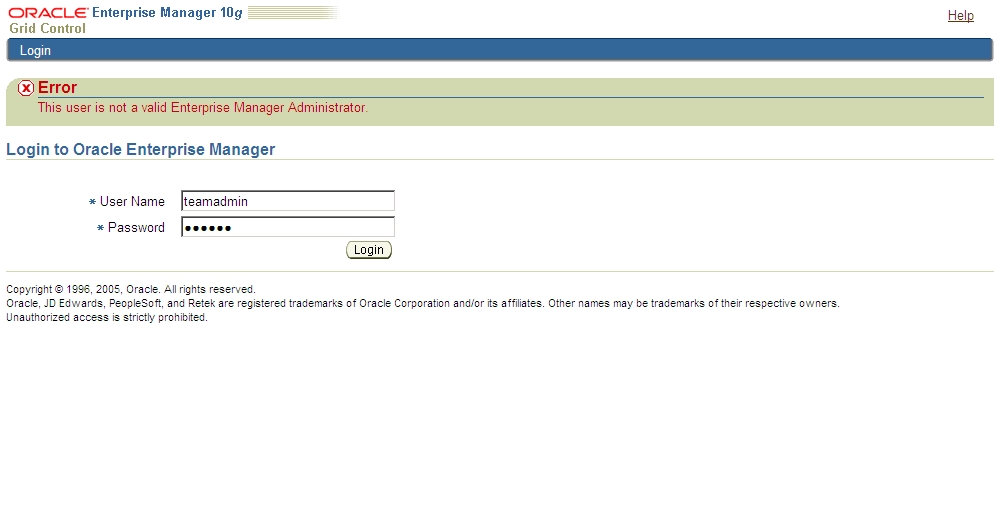
我们这个用create like的方式建立一个类似system用户的超级用户:teamadmin,接下来,我们所有的建立的job的工作就在这个用户下进行。
2、对于db的登录的用户,有个默认Credential的设置的,在Preferred-Credentials菜单中:
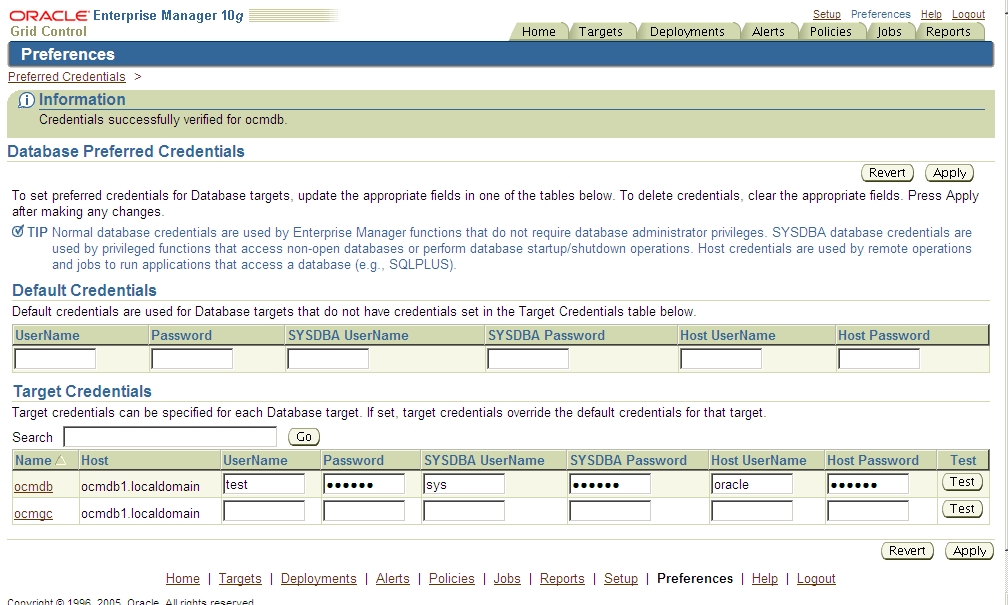
那么再后续的操作中,对于这个数据库的操作,都会用这个这个用户。如果我们这这里没有设置过,就直接去设置job了,就会提示Credential相关的报错:
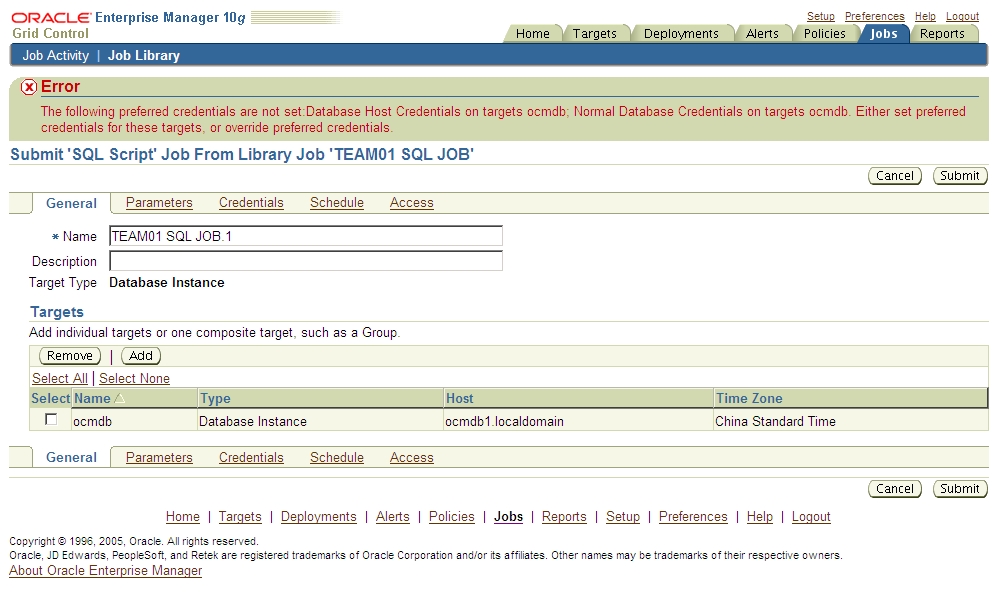
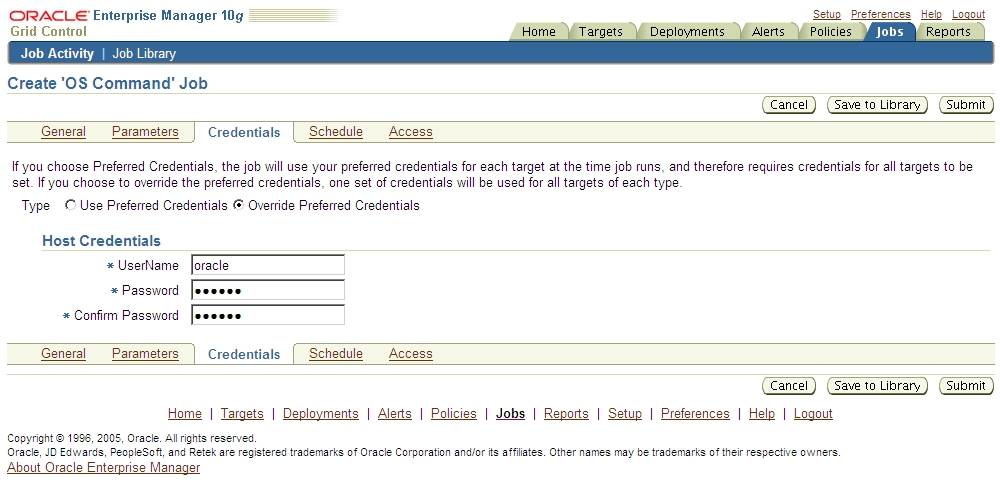
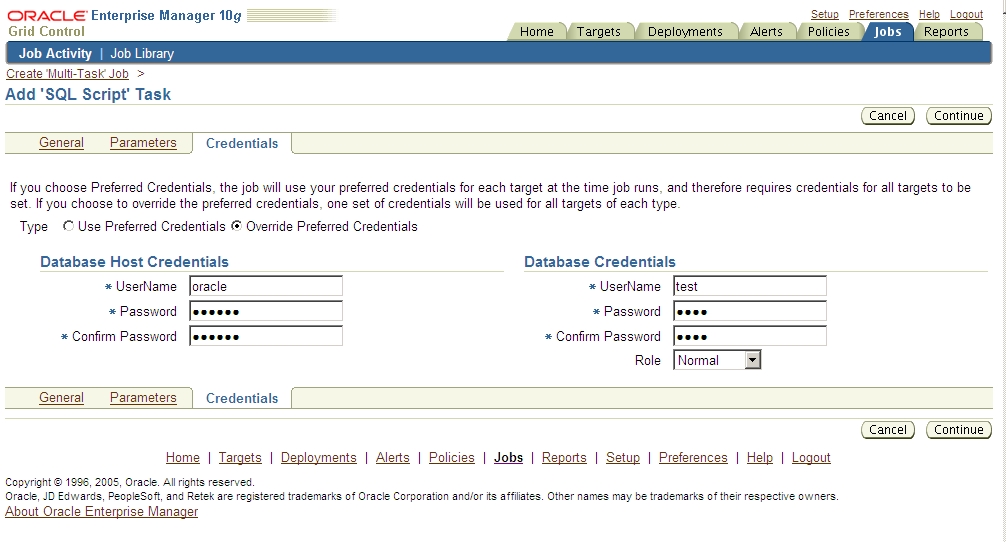
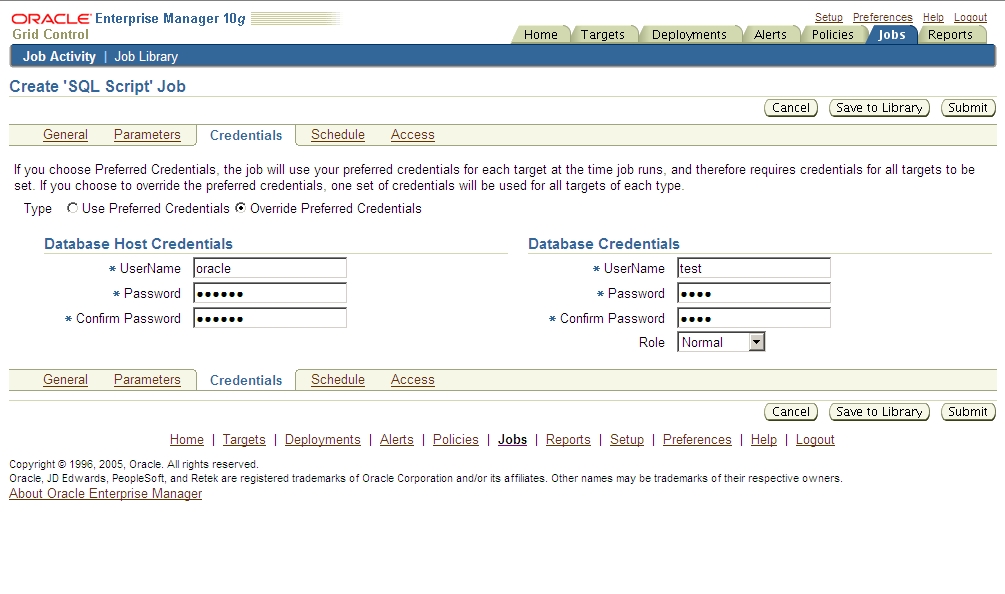
因此,在jobs-create-Credentials中需要overwrite一下:
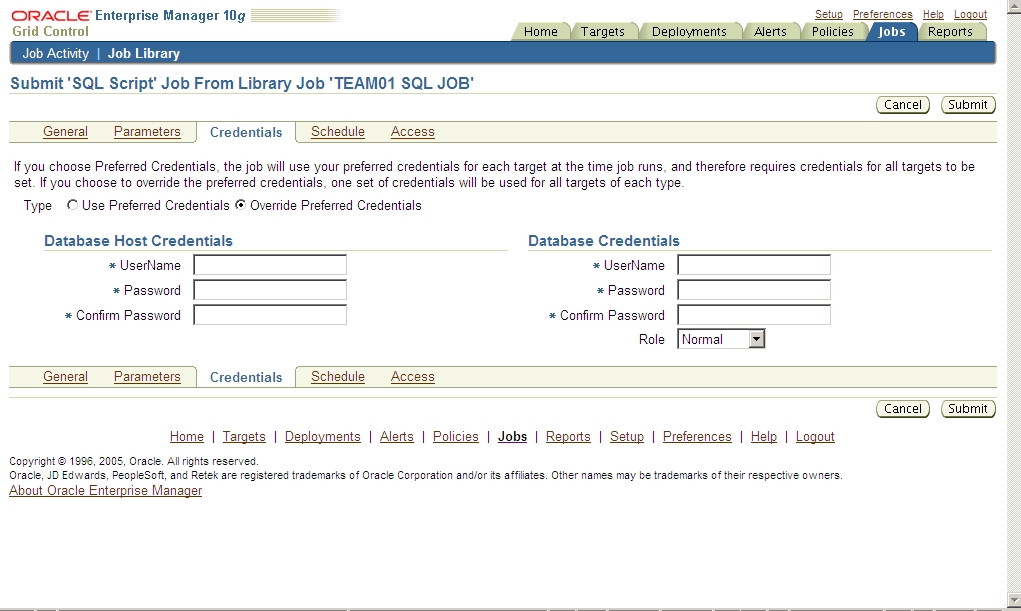
我们建议不勾上Credential,而在建立job的时候用overwrite的方式。
二、开始建立sql script类型的job:
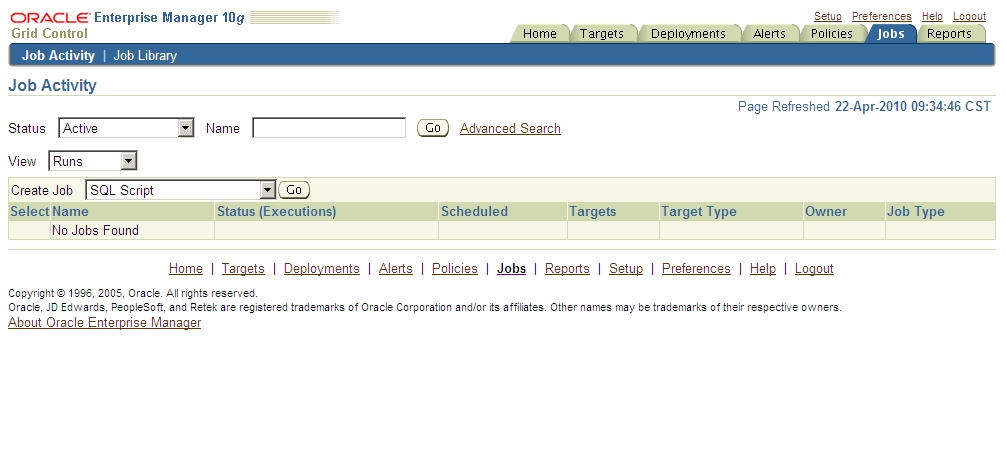
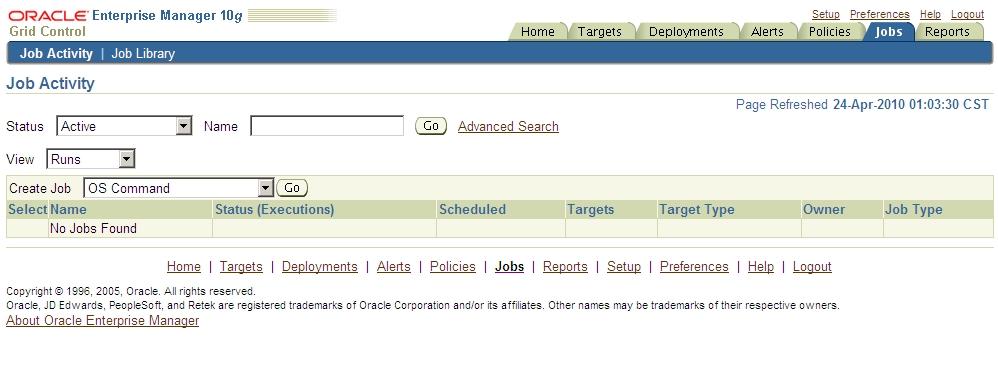
1、到jobs-Job Activity-create job-选择sql script-go:
2、在General菜单上协商job name,在add上target:
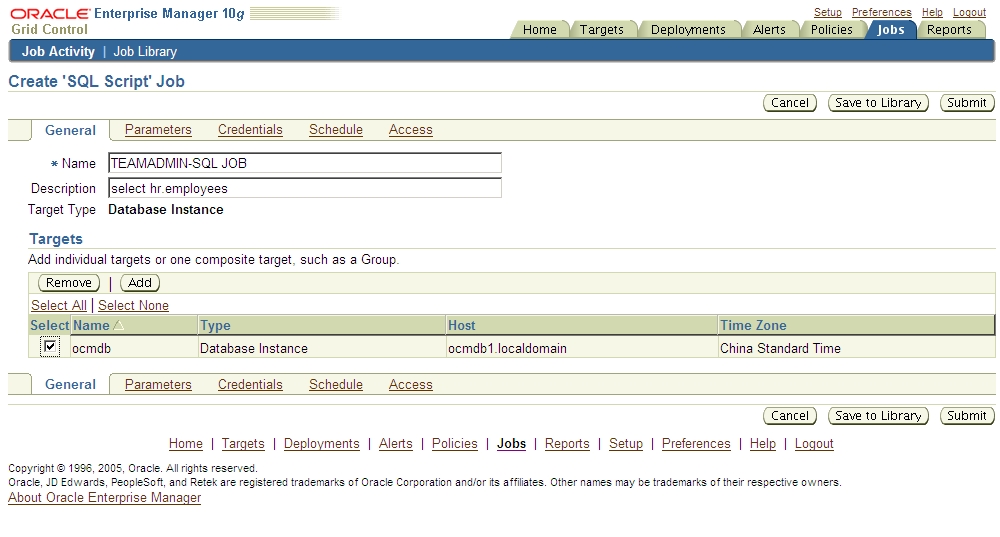
4、在Credentials菜单overwrite Credentials:
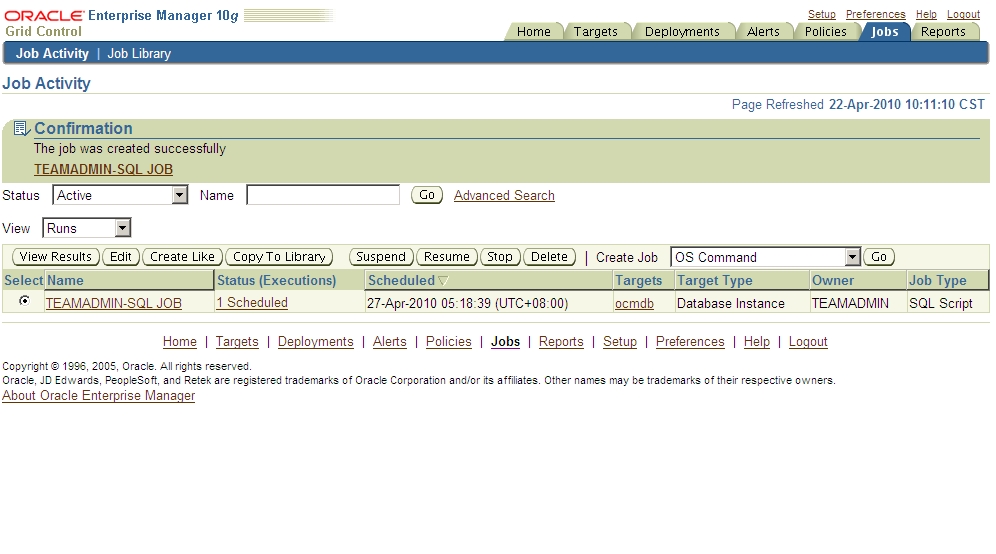
7、点击submit,可以看到The job was created successfully的提示:
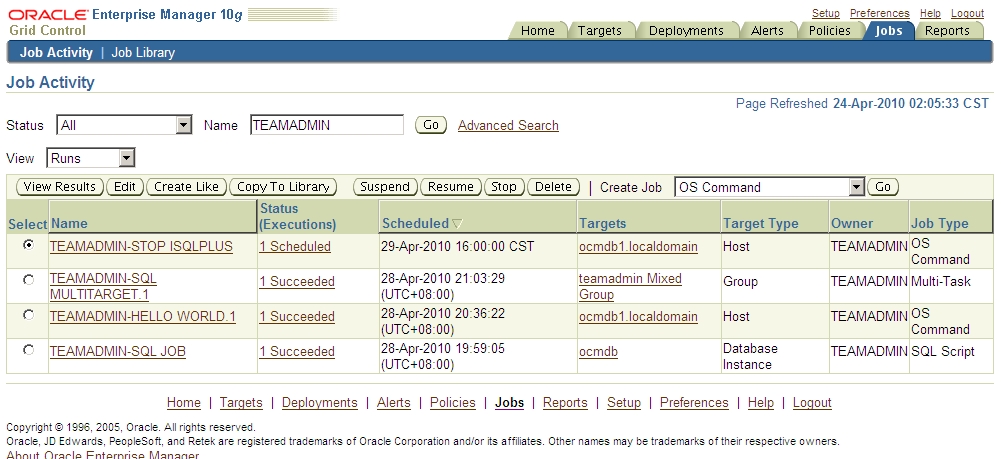
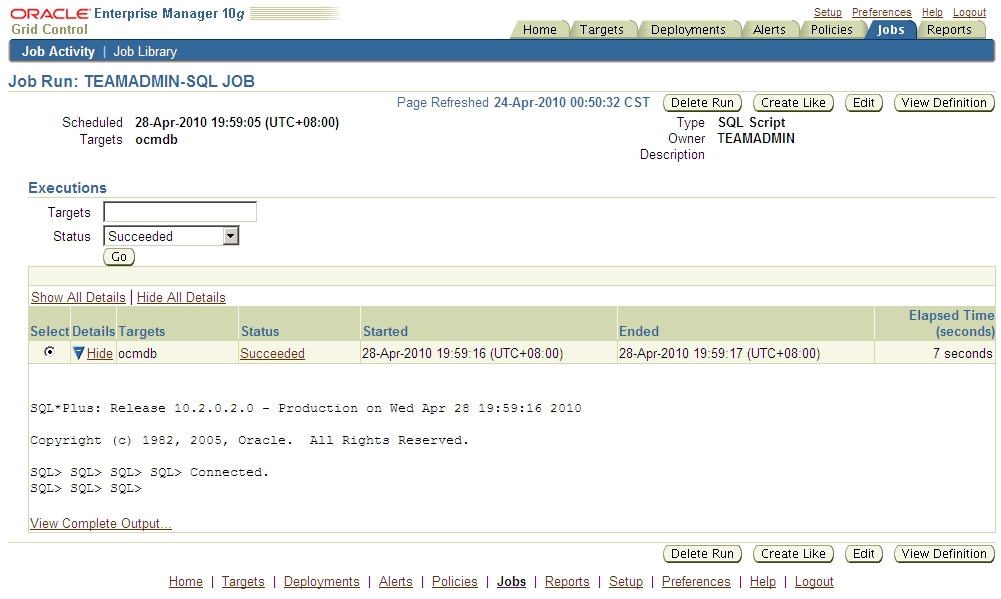
8、稍等片刻我们刷新一下,可以看到状态变成running,到最后就变成Succeeded了。(在Job Activity -Status下拉菜单选择Succeeded,可以看到。再进一步点Succeeded钻到具体状态):
三、开始建立os command类型的job:
1、选择create job的os command 点击go:
6、Access写法和上面的一个job写法一样,这边及后面不再重复贴图。
7、点击submit提交。
四、用Job Library建立os command类型的job:
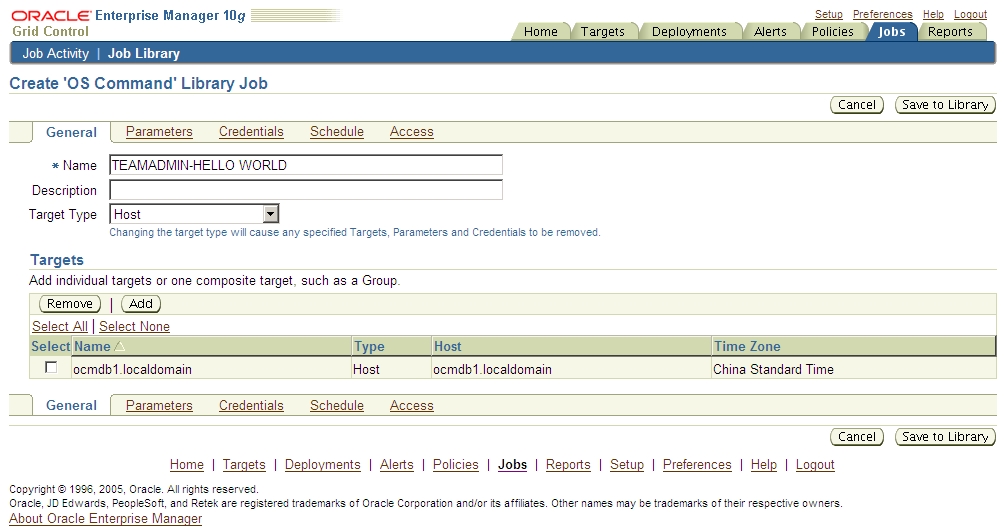
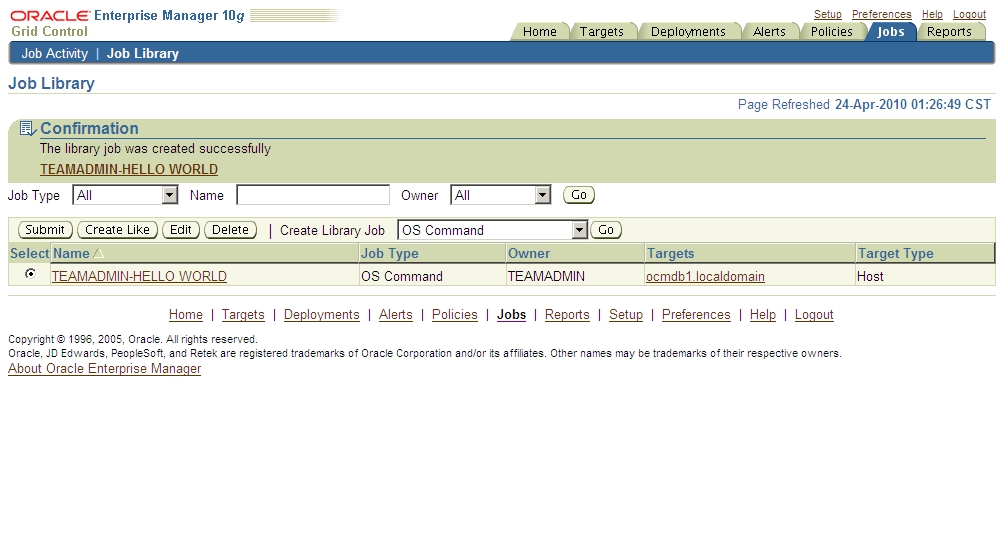
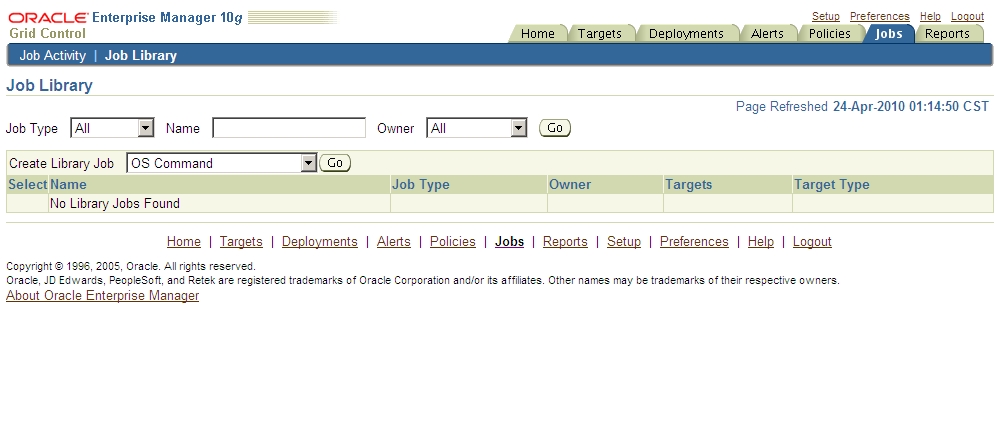
1、到job library菜单,点击os command菜单开始建立:
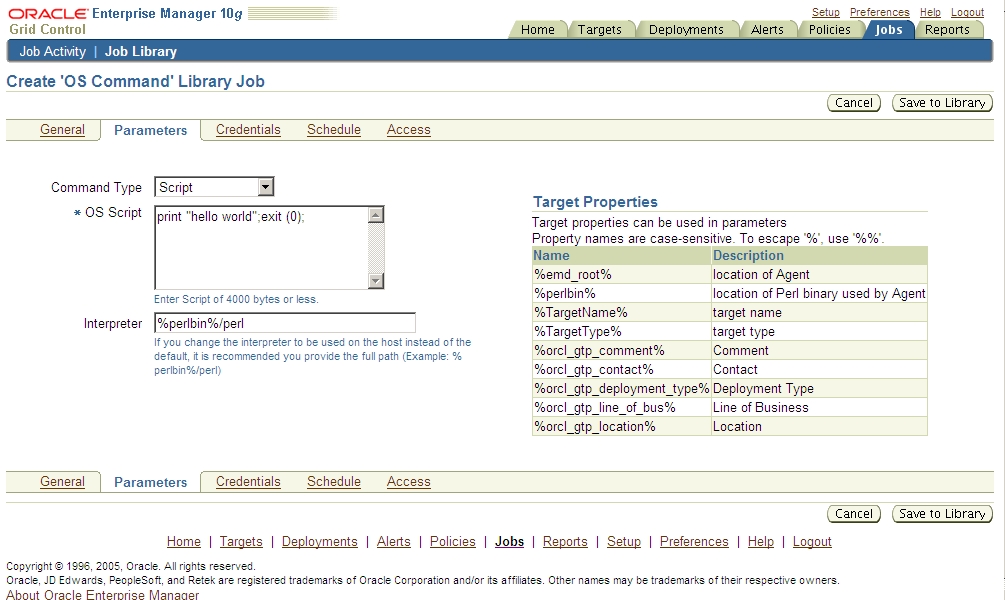
3、parameter的写法:注意Interpreter要写上%perlbin%/perl:
4、Credentials的写法,和上面的一个job一样,本次及后面不再重复贴图。
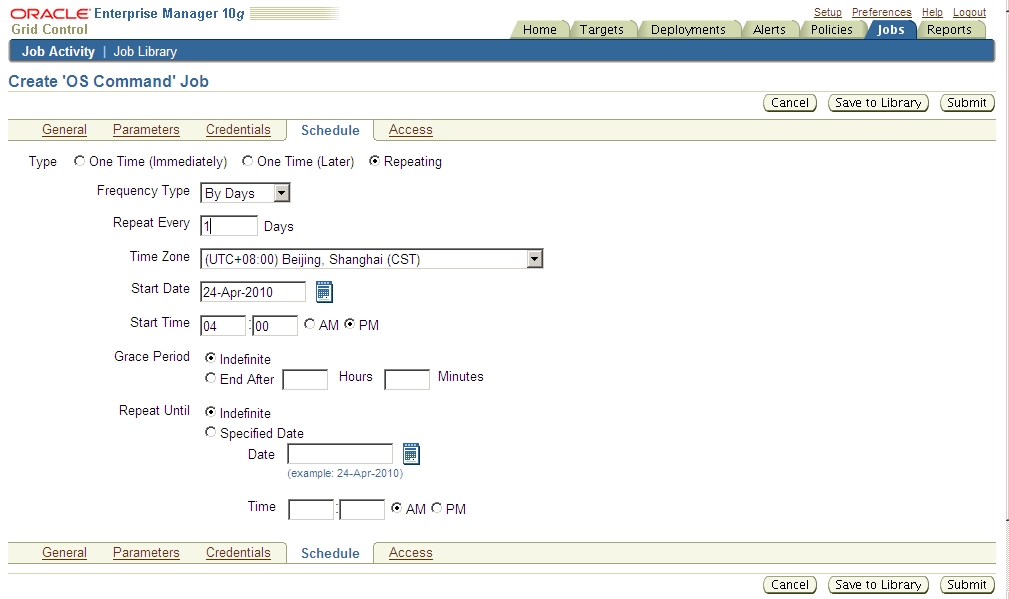
5、Schedule的写法,和上面第二步的job一样,本次及后面不再重复贴图。
6、Access写法和上面的一个job写法一样,这边及后面不再重复贴图。
8、要开始运行的话,选择library中的job之后,点击submit。再次确认后点击submit:

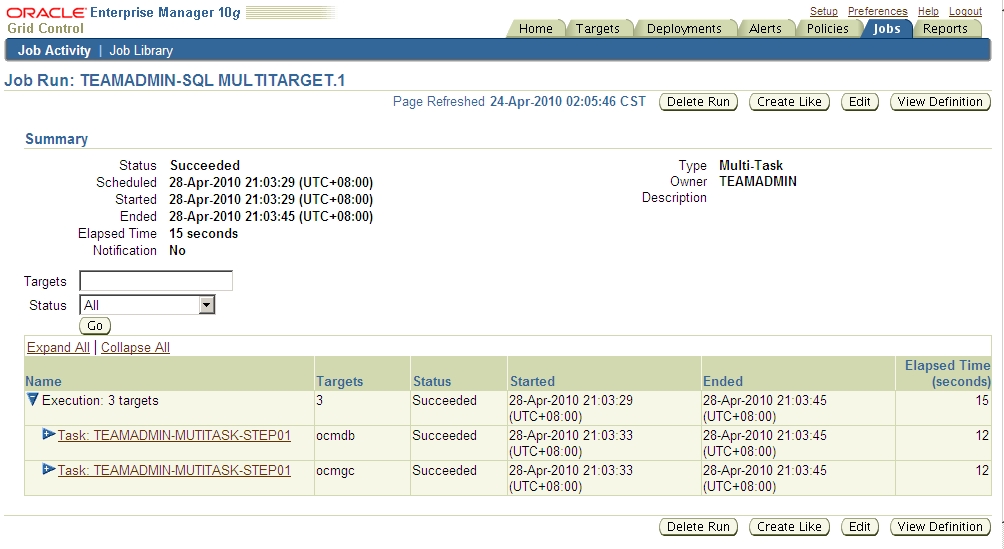
9、最后在Job Activity,你可以看到正在运行或者已经运行成功的job。点status可以继续钻下去,看到结果:

五、建立Multi-Task类型的job(把不同的db instance加入到一个group中,同一个sql运行在这2个db instance上):
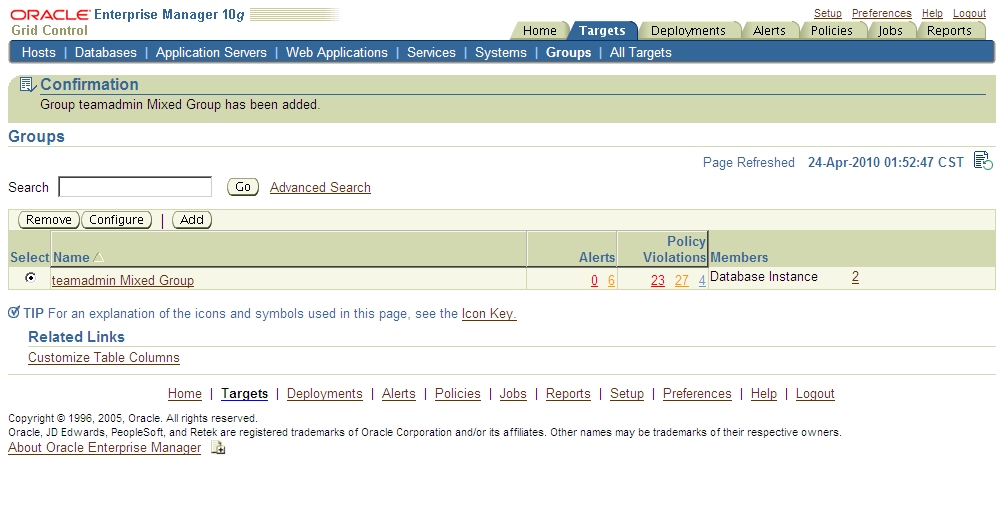
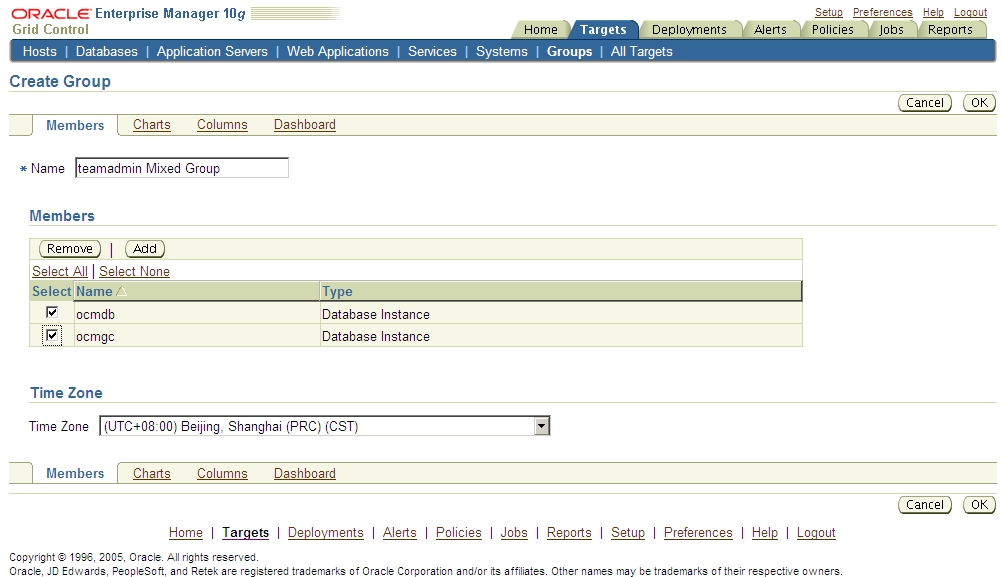
1、点击targets-Groups-add,写上名字,再选择对应的database instance,
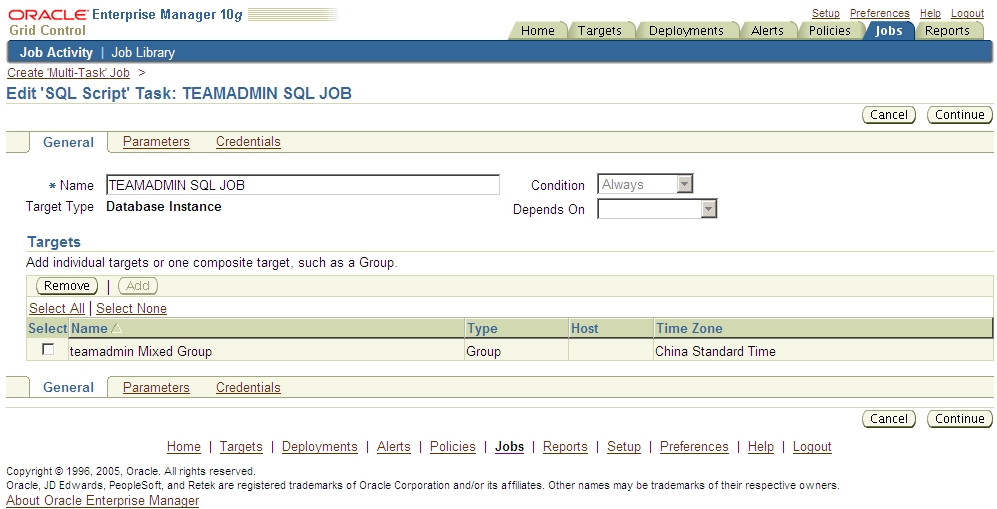
2、返回到job菜单中,create job选择’Multi-Task’ ,然后go:
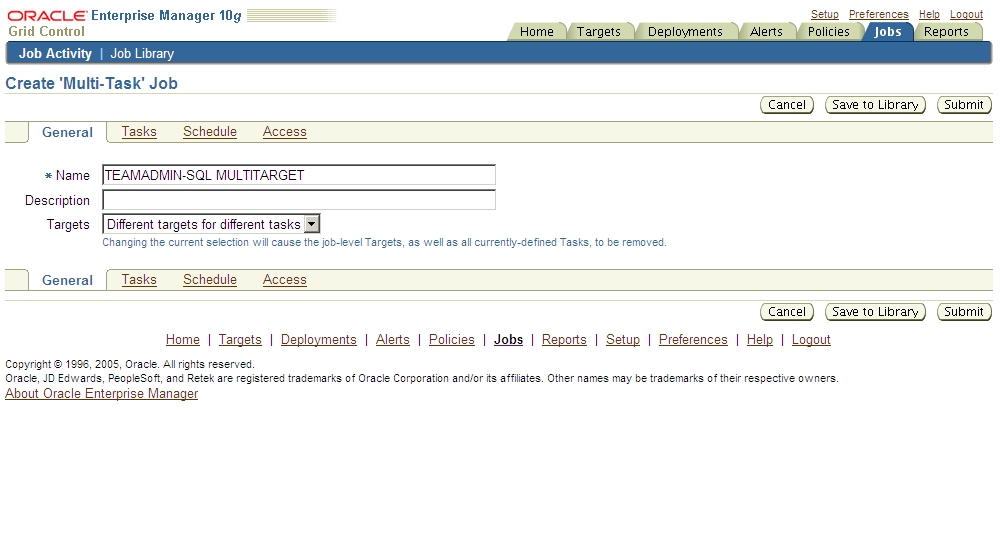
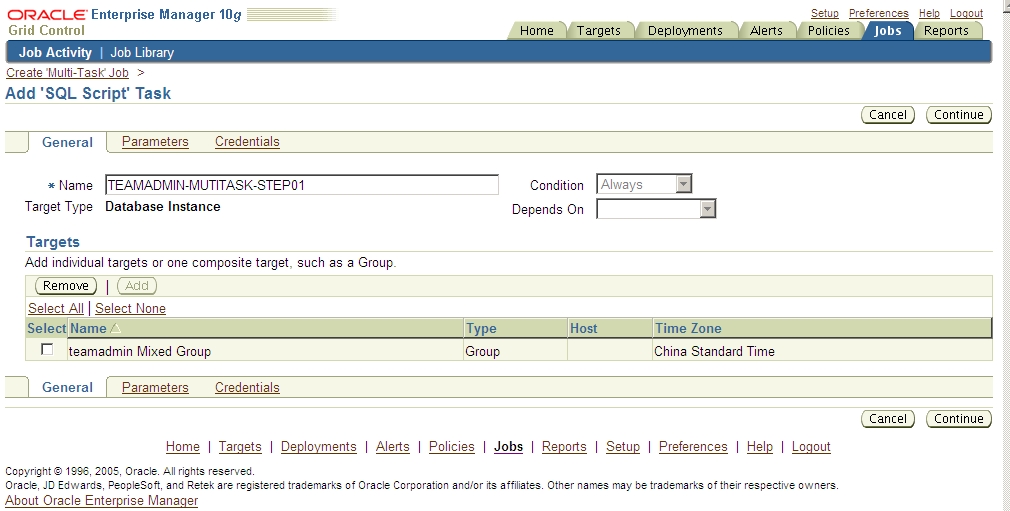
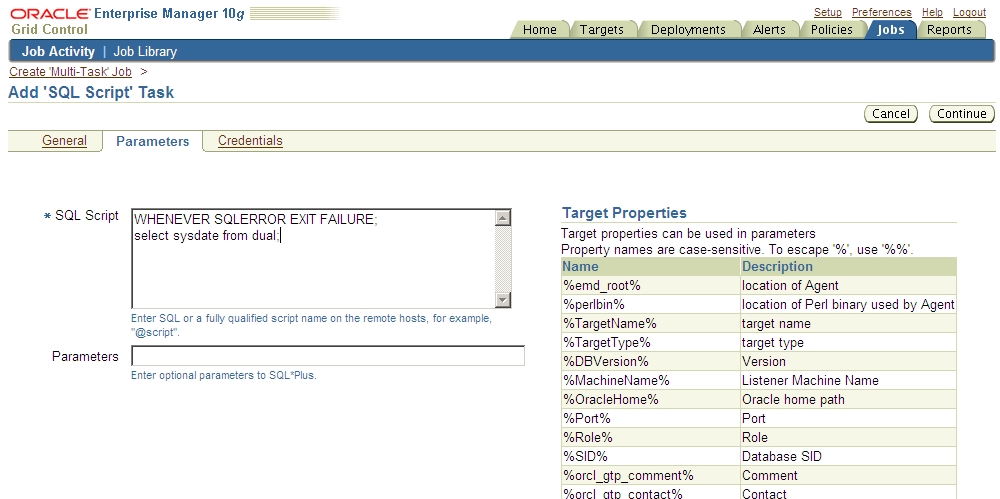
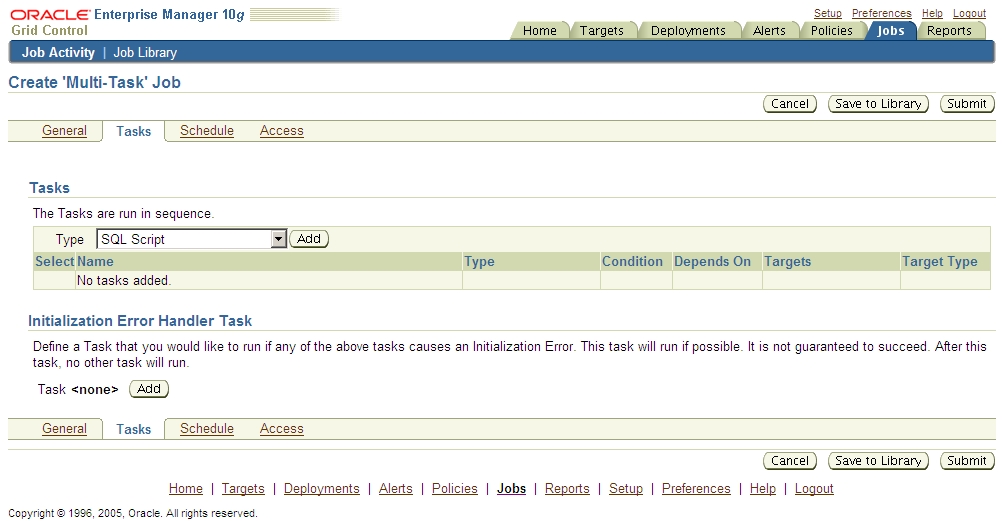
4、在task中点击sql script,开始建立sql脚本类型的语句:
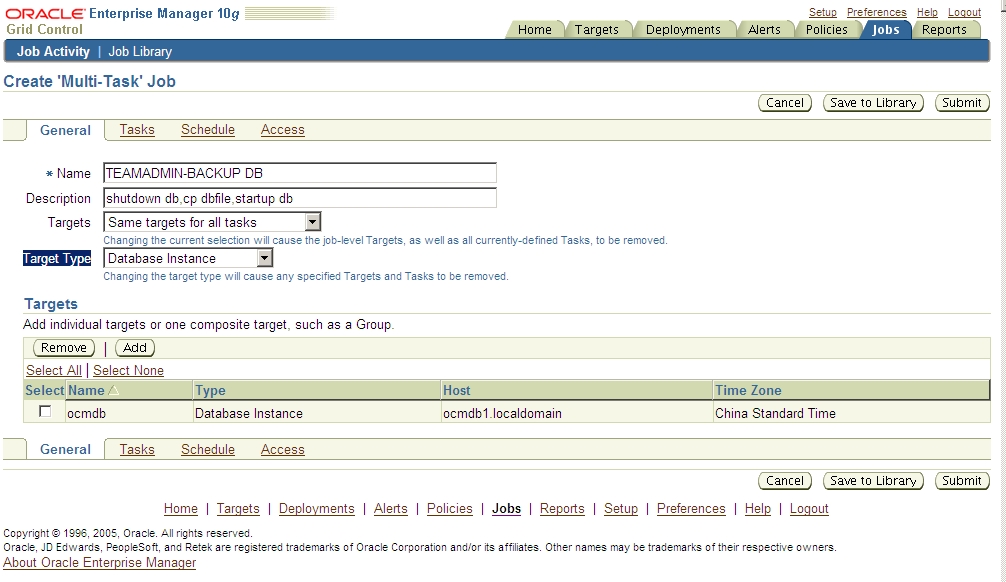
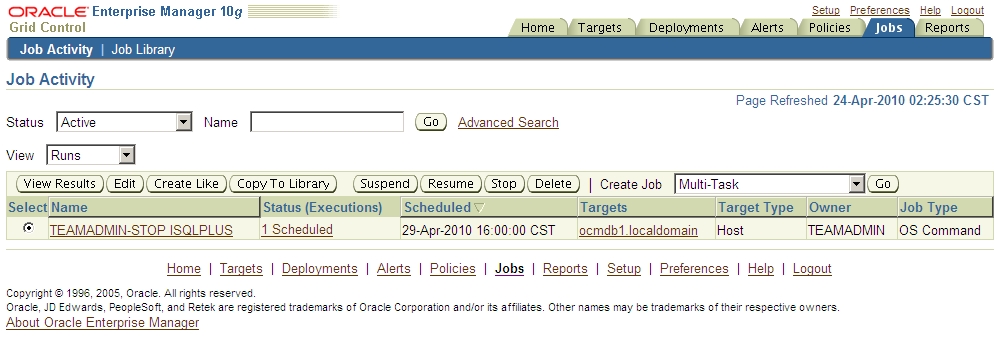
六、建立Multi-Task类型的job(在同一个db上实现down db,拷贝文件,startup db):
1、这个基本也是大同小异,步骤就不讲了,看图吧:
以上就是job system的一些基本操作。各位可以熟悉一下。
题外话:
1、注意repository数据库中的sysman用户密码不要改,不然oms会连接不上:
|
1 2 3 4 5 |
[oracle@ocmdb2 bin]$ ./emctl status oms Oracle Enterprise Manager 10g Release 10.2.0.1.0 Copyright (c) 1996, 2005 Oracle Corporation. All rights reserved. Oracle Management Server is not functioning because of the following reason: Connection to the repository failed. Verify that the repository connection information provided is correct. |
而且多次之后,sysman的账户也会被自动锁定。
关于修改system的密码,可以参见metalink的这个文章(ID 270516.1):
|
1 2 3 4 5 6 7 8 9 10 11 12 13 14 15 16 17 18 19 20 21 22 23 24 25 26 27 28 29 30 31 32 33 34 35 36 37 38 39 40 41 42 43 44 45 46 47 48 49 50 51 52 53 54 55 56 57 58 59 60 61 62 63 64 65 |
To change the SYSMAN password: 1. Stop the agent monitoring the target OMS and Repository in order to avoid that the SYSMAN account is locked during the process of changing the password. If there is only one OMS connected to the repository, stop the agent running on the OMS machine. If there are multiple OMS connected to the same Repository, you need to figure out which agent is monitoring the target OMS and Repository. This is usually the agent installed with the first OMS installed, but it is worth to check it, as there may have been configuration changes in your Grid Control architecture. 1. Find the agent monitoring the target "OMS and Repository" Follow the Note 604311.1 - How To Find which Grid Control agent is monitoring the target "OMS and Repository" in cas of multiple OMS. 2. Connect to the node where the agent is installed with the oracle account and stop the agent (ORACLE_HOME is set and ORACLE_HOME/bin is in the $PATH) $ emctl stop agent 2. Stop all the OMS instances that are associated with the repository From each node where an OMS is running, logged in as oracle account, do: cd <<OMS_HOME>>/opmn/bin opmnctl stopall 3. Change the SYSMAN password in the file emoms.properties 1. Backup the file emoms.properties cd <<OMS_HOME>>/sysman/config cp emoms.properties emoms.properties.orig 2. Edit the file emoms.properties and change the following lines oracle.sysman.eml.mntr.emdRepPwd=new_password oracle.sysman.eml.mntr.emdRepPwdEncrypted=FALSE 4. Change the SYSMAN password in the database hosting the repository: 1. Set the $ORACLE_SID environment variable to point to the EM Repository Database. 2. Logon to the Repository Database with SQL*Plus as a dba user and issue the command: SQL> alter user sysman identified by newpassword; 5. Restart each of the OMS's 1. From each node where an OMS is running, logged in as oracle account, do: cd <<OMS_HOME>>/opmn/bin opmnctl startall 2. Check the following in the <<OMS_HOME>>/sysman/config/emoms.properties file: - the value of the parameter oracle.sysman.eml.mntr.emdRepPwd is encrypted - the value of the parameter oracle.sysman.eml.mntr.emdRepPwdEncrypted is changed from FALSE to TRUE. 6. Change the SYSMAN password for the agent monitoring the "OMS and Repository"target 1. Login to the Grid Control Console 2. From the top right menu, click on the link Setup 3. Select the tab"Management Services and Repository" 4. From the bottom of the page "Overview", click on the link "Monitoring Configuration" You will get the following error message: Communication from the Oracle Management Service host to the Agent host failed. Refer to help for details. IOException in sending Request :: Connection refused This is because the Agent is not started. Click OK. 5. Restart the Agent stopped in Step 1 Connect to the node where the agent is installed with the oracle account and start the agent (ORACLE_HOME is set and ORACLE_HOME/bin is in the $PATH) We did not start it before in order to avoid the SYSMAN account to be locked, which can prevent us from logging to the Grid Control console. $ emctl start agent 6. Go back to the Grid Control console and click again on the link "Monitoring Configuration" once the agent is started. In the Monitoring Configuration page, change the value in the field "Repository password" 7. Click OK This will update the targets.xml of the monitoring agent with the new SYSMAN password. |
2、如果用来管理的数据库新建的用户,在登录targets-databases-Maintenance中提示登录,如果你手工新建一个普通用户只给了connect,resource权限,那么这个用户在登录gc的时候就会报错:
The application requires more database privileges than you have currently been granted

因此,光是connect和resource权限是不能登录gc的,我们还需要SELECT_CATALOG_ROLE权限:
|
1 |
grant select_catalog_role to test; |
其实,为了方便,我们直接给test用户dba权限算了。
|
1 |
grant dba to test; |
