在ocm考试中,rac数据库是安装在远程的主机上,远程的主机是在美国的服务器上。通过vnc连接,如果你不会vnc,平时用xmanager比较多,就像我一样,还是在考前熟悉一下vnc比较好。
ocm的rac安装主要是3点:
1、主机信任机制的配置
2、cluster的安装
3、db软件安装和建库。
我们开始安装:
1、准备工作:
1.1 启动vnc server,其实这一步如果远端没有启动,或有任何vnc连接的问题,都可以向考场老师询问。
|
1 2 3 4 5 6 7 8 9 10 11 12 13 14 15 16 17 18 19 |
[root@ocmrac1 ~]# vncserver You will require a password to access your desktops. Password: Verify: xauth: creating new authority file /root/.Xauthority New 'ocmrac1:1 (root)' desktop is ocmrac1:1 Creating default startup script /root/.vnc/xstartup Starting applications specified in /root/.vnc/xstartup Log file is /root/.vnc/ocmrac1:1.log [root@ocmrac1 ~]# ps -ef |grep vnc root 4461 1 4 22:20 pts/1 00:00:00 Xvnc :1 -desktop ocmrac1:1 (root) -httpd /usr/share/vnc/classes -auth /root/.Xauthority -geometry 1024x768 -depth 16 -rfbwait 30000 -rfbauth /root/.vnc/passwd -rfbport 5901 -pn root 4465 1 0 22:20 pts/1 00:00:00 vncconfig -iconic root 4500 4062 0 22:20 pts/1 00:00:00 grep vnc [root@ocmrac1 ~]# |
如果你进去看不到类似xmanager的界面,你可以修改这个文件:
|
1 |
vi /root/.vnc/xstartup |
将里面的twm & 注释掉,改成gnome-session &:
|
1 2 3 4 5 6 7 8 9 10 11 12 13 14 |
[root@ocmrac1 ~]# cat /root/.vnc/xstartup #!/bin/sh # Uncomment the following two lines for normal desktop: # unset SESSION_MANAGER # exec /etc/X11/xinit/xinitrc [ -x /etc/vnc/xstartup ] && exec /etc/vnc/xstartup [ -r $HOME/.Xresources ] && xrdb $HOME/.Xresources xsetroot -solid grey vncconfig -iconic & xterm -geometry 80x24+10+10 -ls -title "$VNCDESKTOP Desktop" & #twm & gnome-session & |
然后重启vnc服务:
|
1 |
service vncserver restart |
ps:培训的时候问了ou的老师,vnc进去只有最简单的terminal界面,也就是twm &的方式。
1.2 检查2台主机裸设备的划分:此时的裸设备需要能在2个主机上都被看到。因此,如果没有划分好裸设备,需要自己划分,就在db01上用fdisk先划分好,划分好的情况如下所示:
|
1 2 3 4 5 6 7 8 9 10 11 12 13 14 15 16 17 18 19 20 21 22 23 24 25 26 27 28 29 30 31 32 33 34 35 36 37 38 39 40 |
[root@ocmrac1 ~]# fdisk -l Disk /dev/sda: 21.4 GB, 21474836480 bytes 255 heads, 63 sectors/track, 2610 cylinders Units = cylinders of 16065 * 512 = 8225280 bytes Device Boot Start End Blocks Id System /dev/sda1 * 1 910 7309543+ 83 Linux /dev/sda2 911 1170 2088450 82 Linux swap /dev/sda3 1171 2610 11566800 83 Linux Disk /dev/sdb: 536 MB, 536870912 bytes 64 heads, 32 sectors/track, 512 cylinders Units = cylinders of 2048 * 512 = 1048576 bytes Device Boot Start End Blocks Id System /dev/sdb1 1 256 262128 83 Linux /dev/sdb2 257 512 262144 83 Linux Disk /dev/sdc: 3221 MB, 3221225472 bytes 255 heads, 63 sectors/track, 391 cylinders Units = cylinders of 16065 * 512 = 8225280 bytes Device Boot Start End Blocks Id System /dev/sdc1 1 391 3140676 83 Linux Disk /dev/sdd: 3221 MB, 3221225472 bytes 255 heads, 63 sectors/track, 391 cylinders Units = cylinders of 16065 * 512 = 8225280 bytes Device Boot Start End Blocks Id System /dev/sdd1 1 391 3140676 83 Linux Disk /dev/sde: 2147 MB, 2147483648 bytes 255 heads, 63 sectors/track, 261 cylinders Units = cylinders of 16065 * 512 = 8225280 bytes Device Boot Start End Blocks Id System /dev/sde1 1 261 2096451 83 Linux [root@ocmrac1 ~]# |
1.3 检查2台主机裸设备的对应情况和启动裸设备的服务:
|
1 2 3 4 5 6 7 8 9 10 11 12 13 14 15 16 17 18 19 20 21 22 23 24 25 26 27 28 29 |
[root@ocmrac1 ~]# cat /etc/sysconfig/rawdevices # This file and interface are deprecated. # Applications needing raw device access should open regular # block devices with O_DIRECT. # raw device bindings # format: <rawdev> <major> <minor> # <rawdev> <blockdev> # example: /dev/raw/raw1 /dev/sda1 # /dev/raw/raw2 8 5 /dev/raw/raw1 /dev/sdc1 /dev/raw/raw2 /dev/sdd1 /dev/raw/raw3 /dev/sde1 /dev/raw/raw4 /dev/sdb1 /dev/raw/raw5 /dev/sdb2 [root@ocmrac1 ~]# [root@ocmrac1 ~]# service rawdevices restart Assigning devices: /dev/raw/raw1 --> /dev/sdc1 /dev/raw/raw1: bound to major 8, minor 33 /dev/raw/raw2 --> /dev/sdd1 /dev/raw/raw2: bound to major 8, minor 49 /dev/raw/raw3 --> /dev/sde1 /dev/raw/raw3: bound to major 8, minor 65 /dev/raw/raw4 --> /dev/sdb1 /dev/raw/raw4: bound to major 8, minor 17 /dev/raw/raw5 --> /dev/sdb2 /dev/raw/raw5: bound to major 8, minor 18 done [root@ocmrac1 ~]# |
1.4 检查2台主机裸设备宿主情况:
|
1 2 3 4 5 6 7 8 |
[root@ocmrac1 ~]# ls -l /dev/raw/ total 0 crw-rw---- 1 oracle dba 162, 1 Jun 9 10:29 raw1 crw-rw---- 1 oracle dba 162, 2 Jun 9 10:29 raw2 crw-rw---- 1 oracle dba 162, 3 Jun 9 10:29 raw3 crw-rw---- 1 oracle dba 162, 4 Jun 9 10:29 raw4 crw-rw---- 1 oracle dba 162, 5 Jun 9 10:29 raw5 [root@ocmrac1 ~]# |
1.5 配置主机间信任关系:
1.5.1 检查2个机器oracle的home目录权限是否为755:
|
1 2 3 |
[root@ocmrac2 home]# ll total 8 drwxr-xr-x 3 oracle dba 4096 Jun 9 11:49 oracle |
1.5.2 生产rsa和dsa的私有key和public key:
在rac1:
|
1 2 3 4 5 6 7 8 9 10 11 12 13 14 15 16 17 18 19 20 21 |
ocmrac1-> ssh-keygen -t rsa Generating public/private rsa key pair. Enter file in which to save the key (/export/home/oracle/.ssh/id_rsa): Enter passphrase (empty for no passphrase): Enter same passphrase again: Your identification has been saved in /export/home/oracle/.ssh/id_rsa. Your public key has been saved in /export/home/oracle/.ssh/id_rsa.pub. The key fingerprint is: 95:23:e0:f1:64:9c:97:cf:42:e2:ca:40:73:ce:98:45 oracle@ocmrac1 ocmrac1-> ocmrac1-> ssh-keygen -t dsa Generating public/private dsa key pair. Enter file in which to save the key (/export/home/oracle/.ssh/id_dsa): Enter passphrase (empty for no passphrase): Enter same passphrase again: Your identification has been saved in /export/home/oracle/.ssh/id_dsa. Your public key has been saved in /export/home/oracle/.ssh/id_dsa.pub. The key fingerprint is: 79:80:99:f7:fb:b4:db:e9:89:7c:4b:f2:cc:37:36:87 oracle@ocmrac1 ocmrac1-> |
在rac2上:
|
1 2 3 4 5 6 7 8 9 10 11 12 13 14 15 16 17 18 19 20 21 22 |
ocmrac2-> ssh-keygen -t rsa Generating public/private rsa key pair. Enter file in which to save the key (/export/home/oracle/.ssh/id_rsa): Enter passphrase (empty for no passphrase): Enter same passphrase again: Your identification has been saved in /export/home/oracle/.ssh/id_rsa. Your public key has been saved in /export/home/oracle/.ssh/id_rsa.pub. The key fingerprint is: 90:04:2e:46:c1:14:36:1c:84:b1:69:88:ae:ae:9c:86 oracle@ocmrac2 ocmrac2-> ocmrac2-> ocmrac2-> ocmrac2-> ssh-keygen -t dsa Generating public/private dsa key pair. Enter file in which to save the key (/export/home/oracle/.ssh/id_dsa): Enter passphrase (empty for no passphrase): Enter same passphrase again: Your identification has been saved in /export/home/oracle/.ssh/id_dsa. Your public key has been saved in /export/home/oracle/.ssh/id_dsa.pub. The key fingerprint is: 1a:20:06:f6:3e:fc:7f:50:38:87:c4:fd:73:8c:7d:bb oracle@ocmrac2 ocmrac2-> |
1.5.3 将pub key加入到authorized_keys:
在rac1上:
|
1 2 3 4 5 6 7 8 9 10 |
ocmrac1-> cat id_dsa.pub>>authorized_keys ocmrac1-> cat id_rsa.pub>>authorized_keys ocmrac1-> ssh ocmrac2 cat /export/home/oracle/.ssh/id_dsa.pub>>authorized_keys oracle@ocmrac2's password: ocmrac1-> ocmrac1-> ocmrac1-> ocmrac1-> ssh ocmrac2 cat /export/home/oracle/.ssh/id_rsa.pub>>authorized_keys oracle@ocmrac2's password: ocmrac1-> |
在rac2上:
|
1 2 3 4 5 6 7 |
ocmrac2-> ssh ocmrac1 cat /export/home/oracle/.ssh/authorized_keys>>authorized_keys The authenticity of host 'ocmrac1 (192.168.190.81)' can't be established. RSA key fingerprint is 69:07:46:e9:80:e6:d7:0f:b0:cb:54:e0:c3:66:39:be. Are you sure you want to continue connecting (yes/no)? yes Warning: Permanently added 'ocmrac1,192.168.190.81' (RSA) to the list of known hosts. ocmrac2-> ocmrac2-> |
1.5.4 测试:
在2台机器上分别:
|
1 2 3 4 5 6 7 8 9 10 11 12 13 14 15 16 17 18 19 20 |
ocmrac1-> ssh localhost date Wed Jun 9 13:20:43 CST 2010 ocmrac1-> ssh localhost.oracle.com date Wed Jun 9 13:20:49 CST 2010 ocmrac1-> ssh ocmrac1 date Wed Jun 9 13:20:53 CST 2010 ocmrac1-> ssh ocmrac1.oracle.com date Wed Jun 9 13:20:59 CST 2010 ocmrac1-> ssh ocmrac2 date Wed Jun 9 13:21:04 CST 2010 ocmrac1-> ssh ocmrac2.oracle.com date Wed Jun 9 13:21:11 CST 2010 ocmrac1-> ssh ocmrac1-priv date Wed Jun 9 13:21:19 CST 2010 ocmrac1-> ssh ocmrac1-priv.oracle.com date Wed Jun 9 13:21:26 CST 2010 ocmrac1-> ssh ocmrac2-priv date Wed Jun 9 13:21:32 CST 2010 ocmrac1-> ssh ocmrac2-priv.oracle.com date Wed Jun 9 13:27:46 CST 2010 |
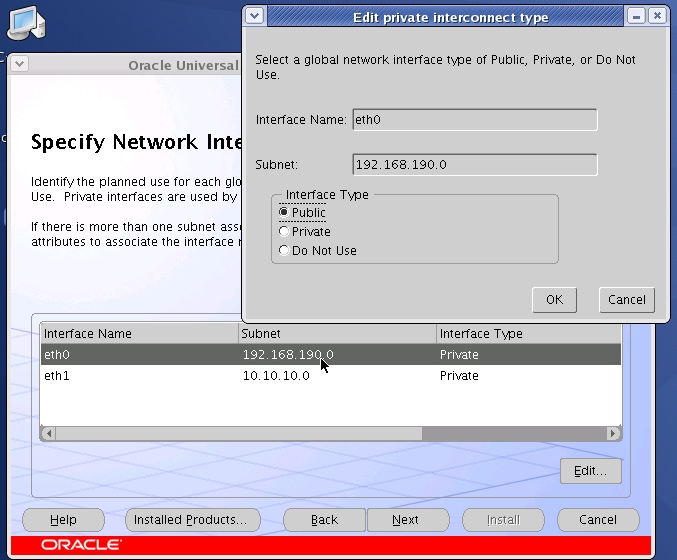
1.5.5 检查2台机器的网卡是否都工作正常,public的是否配置了default gateway(如果这个不配,在运行完root.sh之后,配置vipca的时候会报错的)。
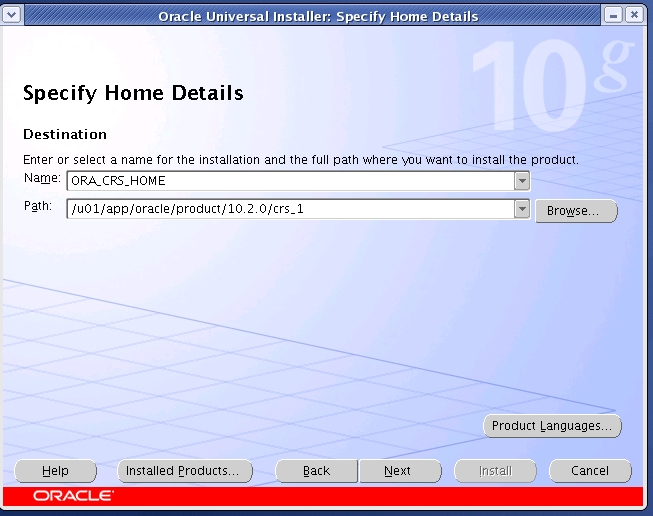
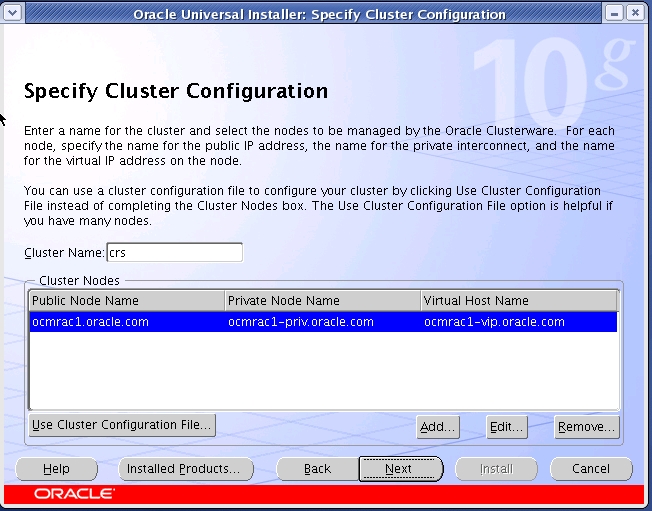
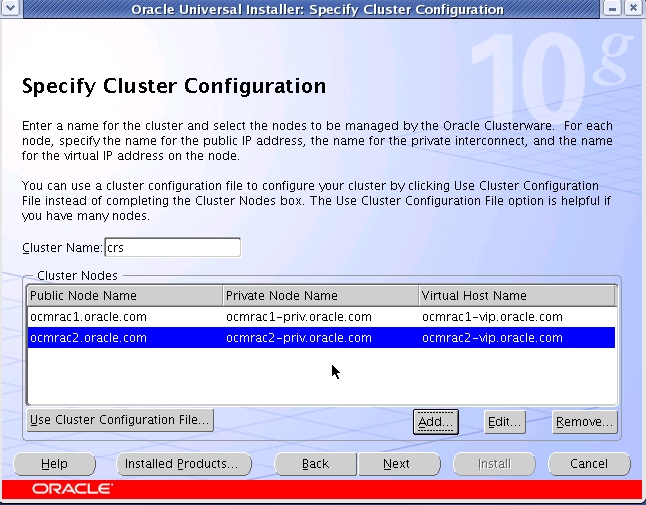
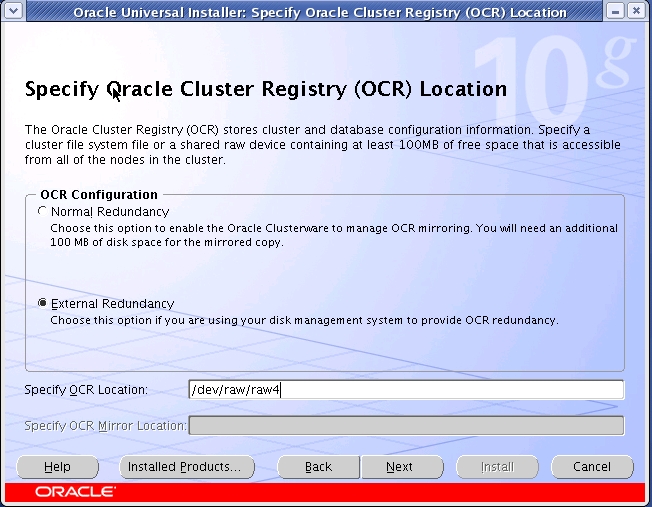
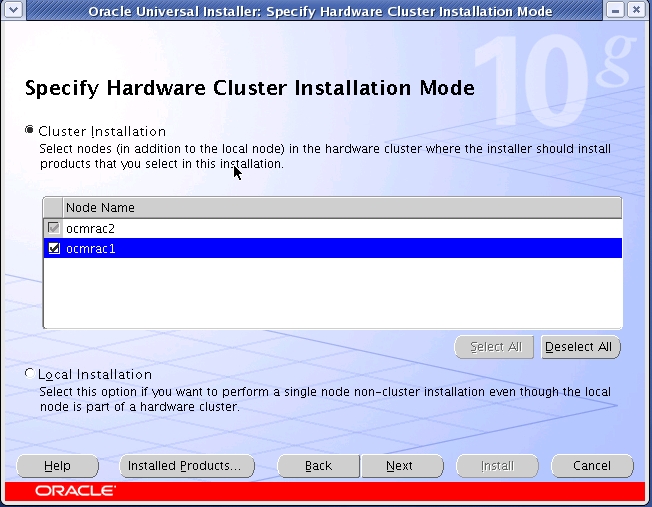
1.6 运行runInstaller进行安装cluster。
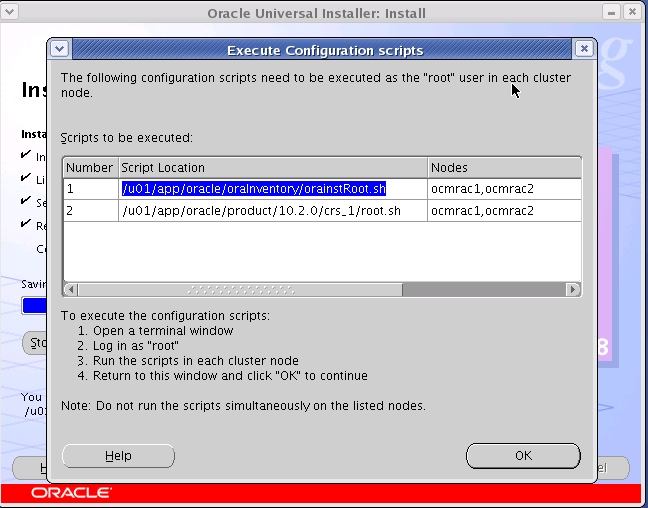
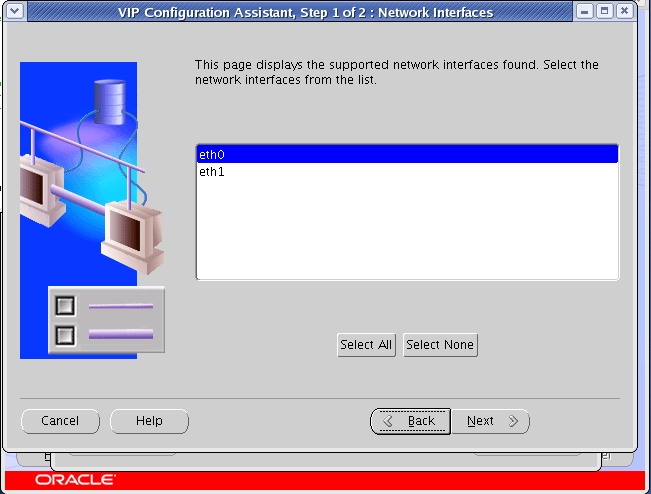
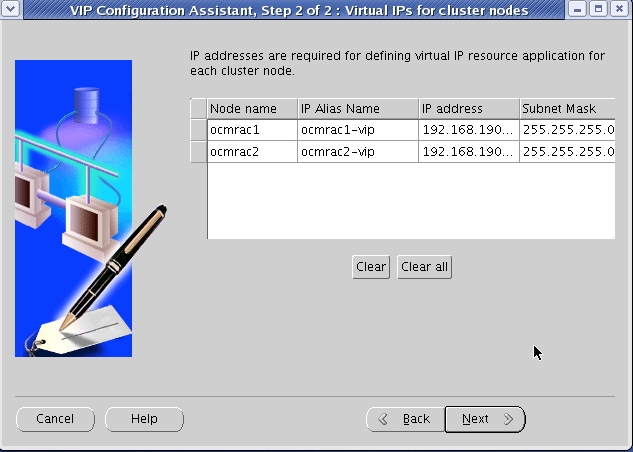
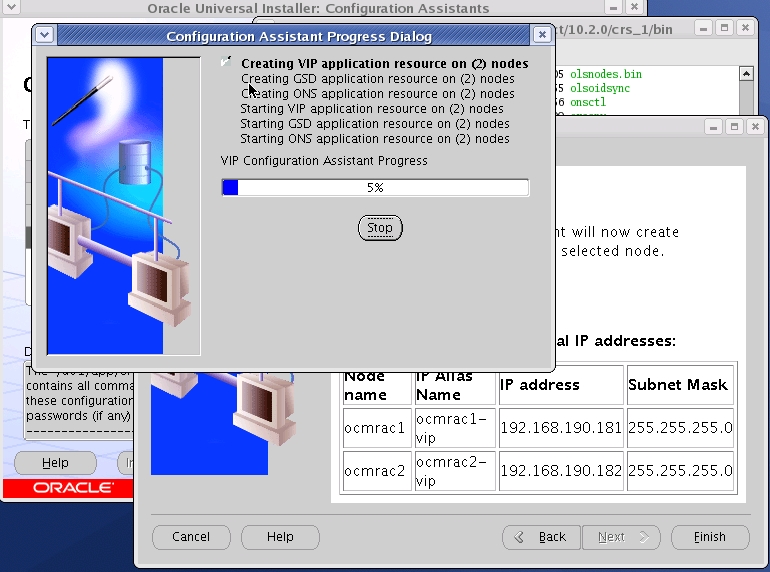
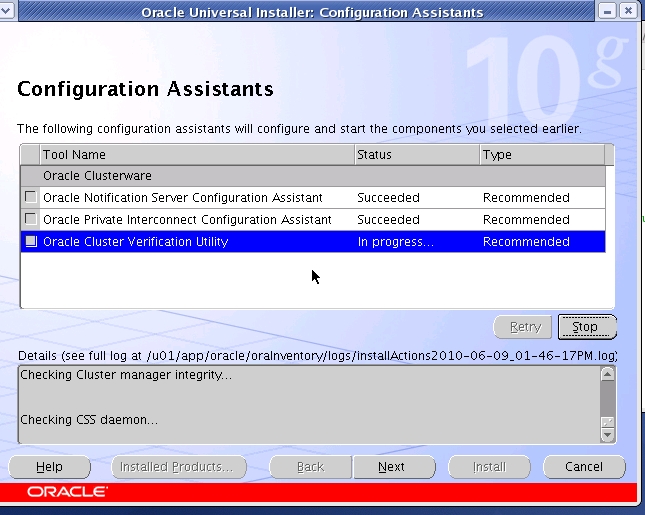
运行完成后,运行orainstRoot.sh和root.sh注意执行完在节点2会报错vip的问题,我们需要再次vipca,进行配置后才能按ok:
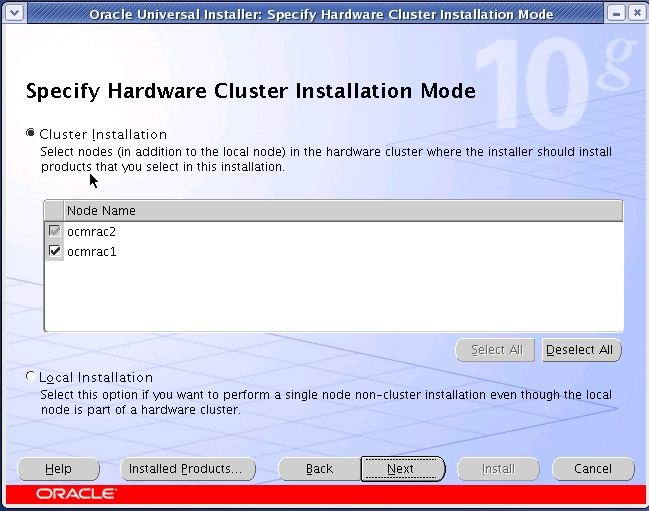
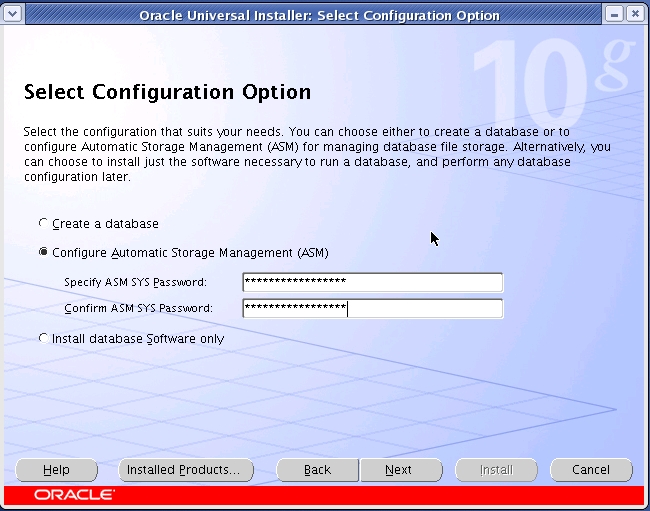
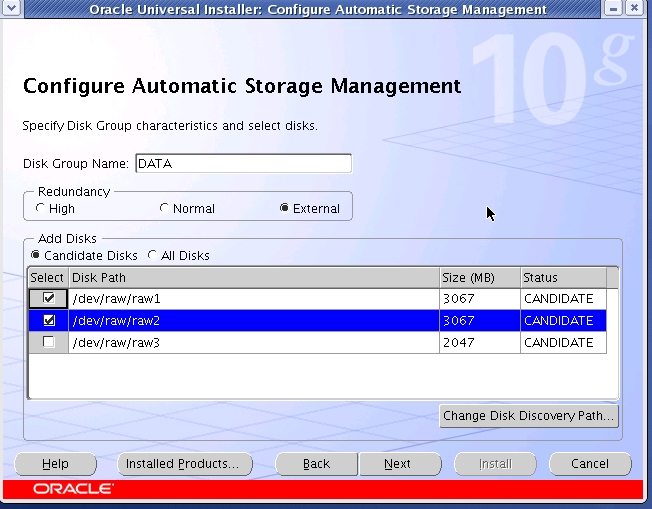
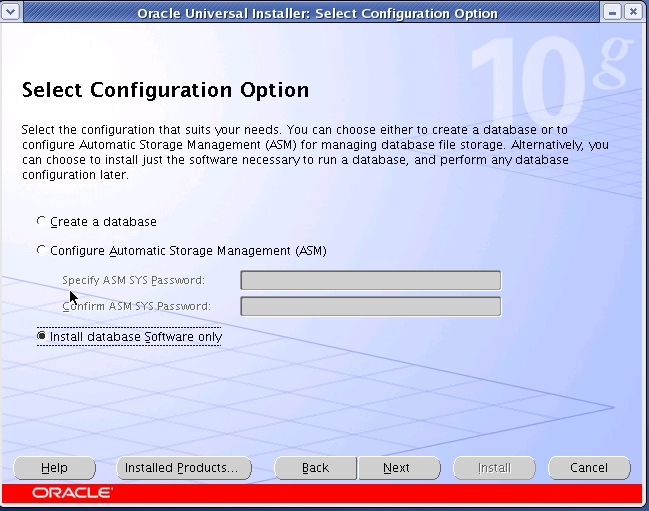
1.7 运行runInstaller安装asm:
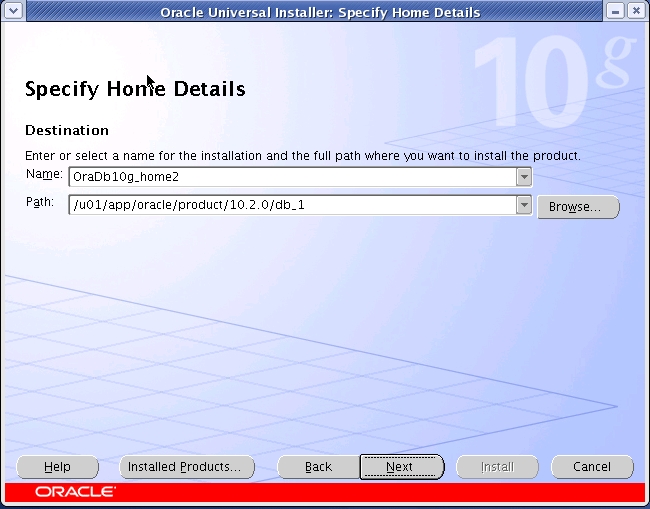
最好选择一个独立的asm_home:
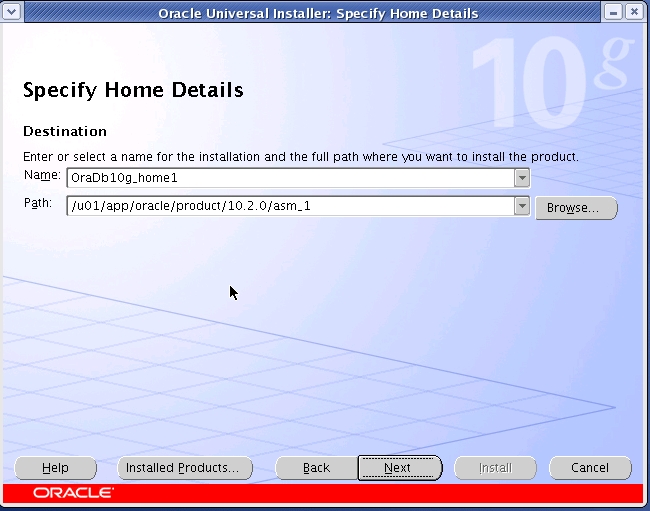
这里提醒下大家,由于指定了一个不同的asm_home,在手工停asm实例的时候,不仅必须export ORACLE_SID为asm是实例名,还要export ORACLE_HOME为你刚刚指定的asm_home。所以其实如果为了考试简单起见,也可以直接用db_1这个asm_home。
1.9 安装实例:
1.9.1 先用crs_stat -t 检查一下是否状态正常,没有的话,用crs_stop -all或crs_stop -f/crs_start -all重启一下:
|
1 2 3 4 5 6 7 8 9 10 11 12 13 14 |
ocmrac2-> crs_stat -t Name Type Target State Host ------------------------------------------------------------ ora....SM1.asm application ONLINE ONLINE ocmrac1 ora....C1.lsnr application ONLINE ONLINE ocmrac1 ora....ac1.gsd application ONLINE ONLINE ocmrac1 ora....ac1.ons application ONLINE ONLINE ocmrac1 ora....ac1.vip application ONLINE ONLINE ocmrac1 ora....SM2.asm application ONLINE ONLINE ocmrac2 ora....C2.lsnr application ONLINE ONLINE ocmrac2 ora....ac2.gsd application ONLINE ONLINE ocmrac2 ora....ac2.ons application ONLINE ONLINE ocmrac2 ora....ac2.vip application ONLINE ONLINE ocmrac2 ocmrac2-> |
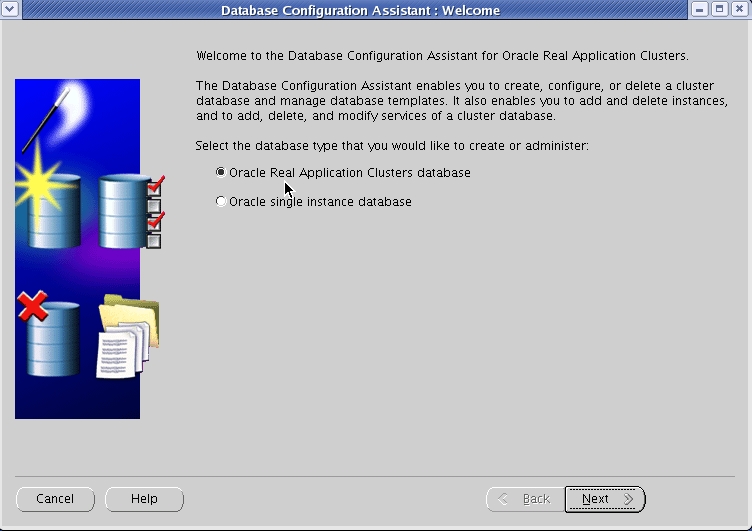
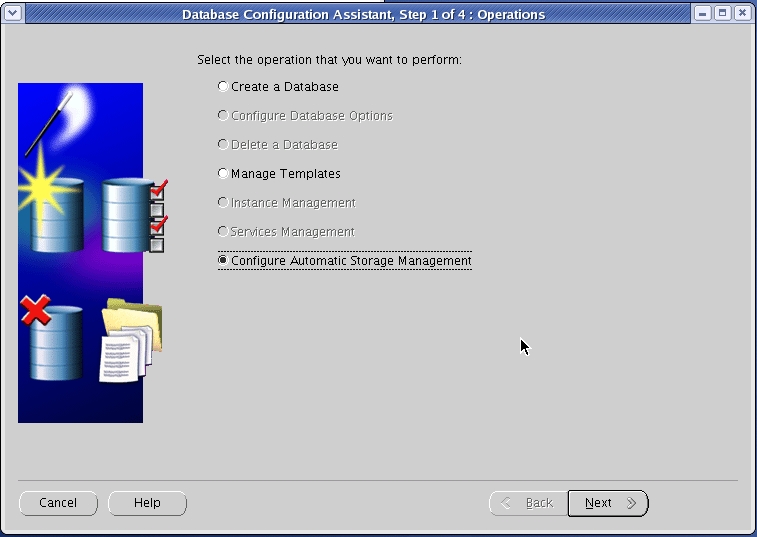
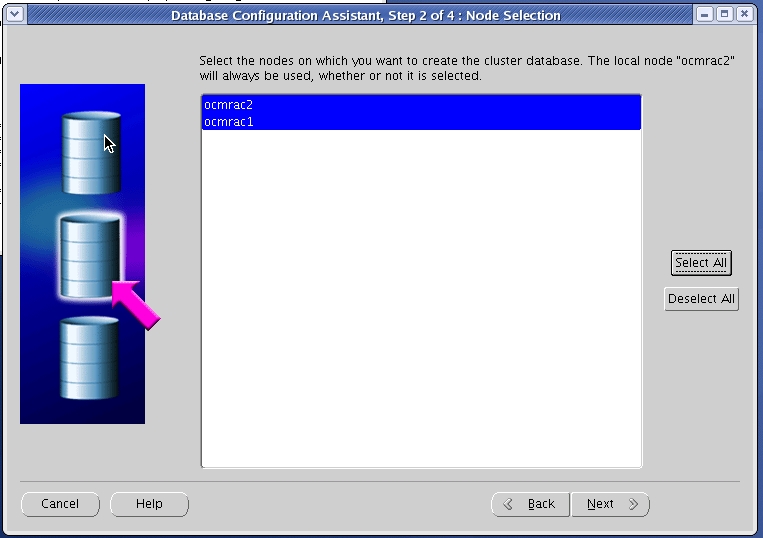
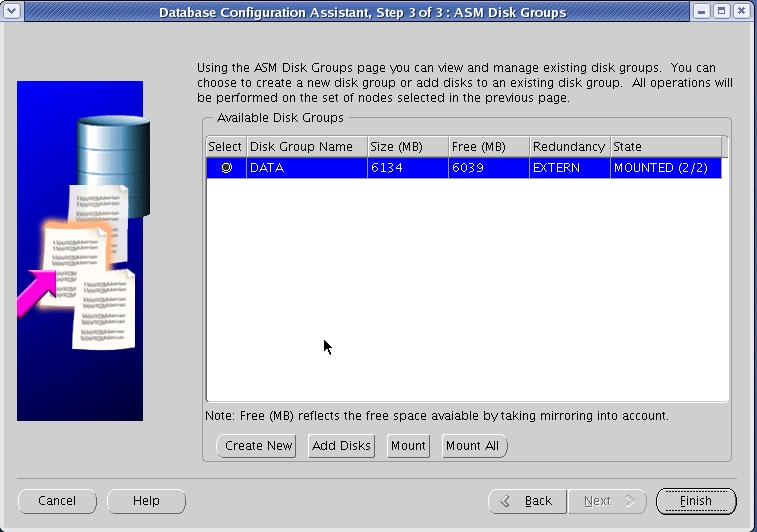
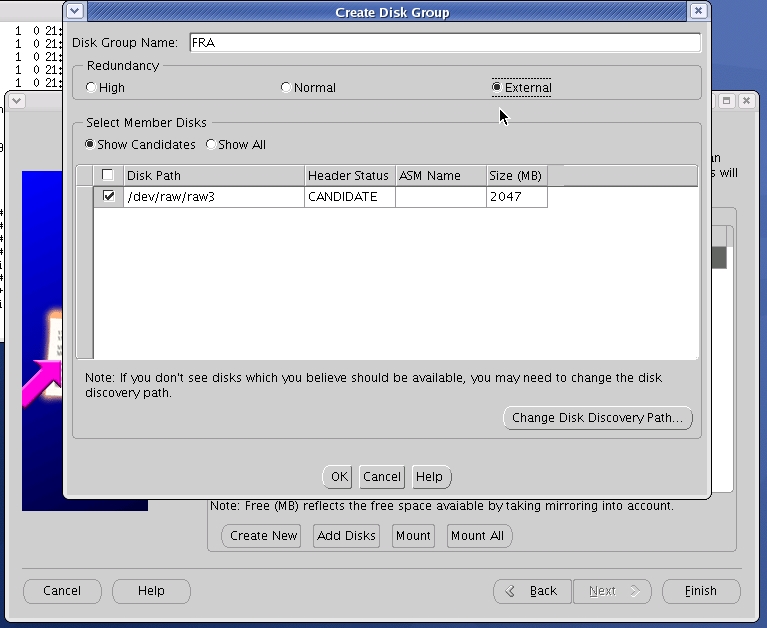
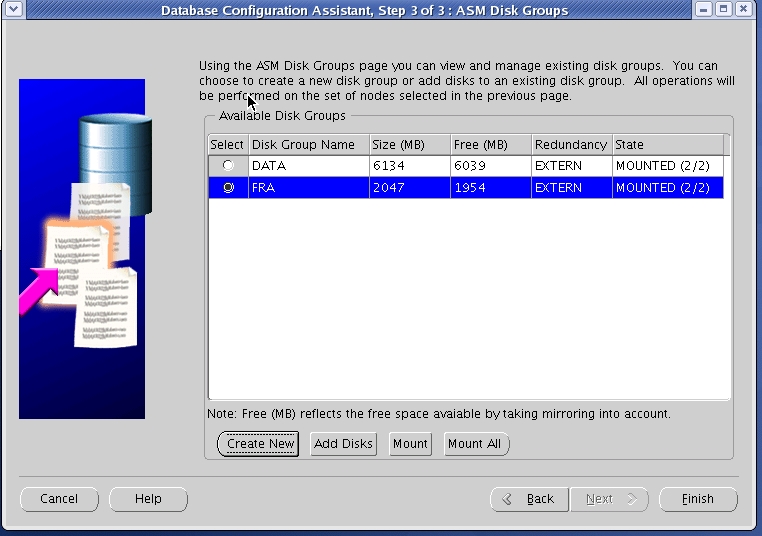
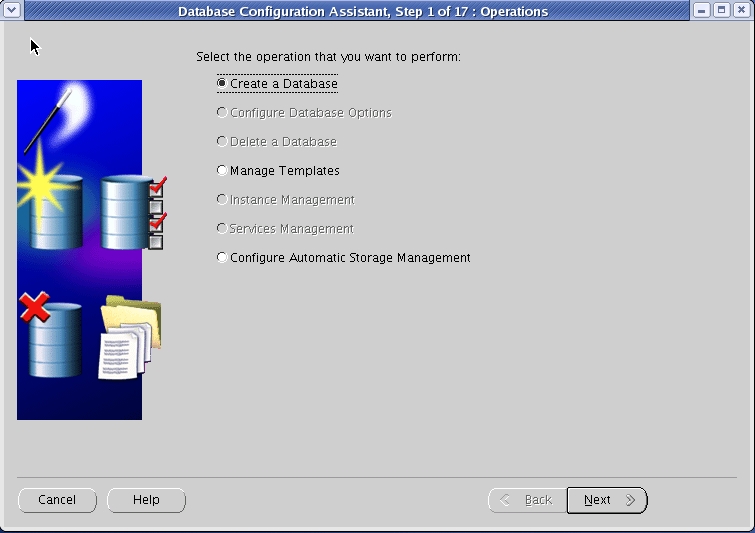
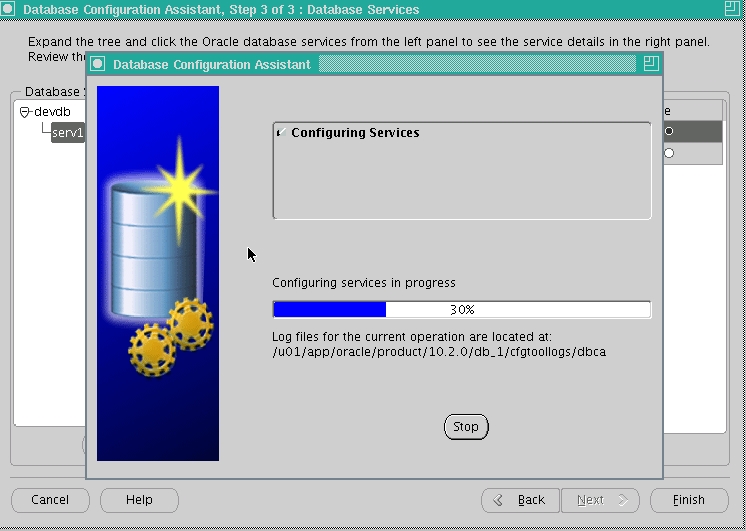
1.9.2 用dbca开始安装:
先在asm上再划一个存储用作一会需要的flash recovery area:
后续db instance创建的截图这边就先略了。
以上,rac的安装只是一个很简单的题目,可以说是个送分的题目。rac的考点还是网络的设置:如侦听的设置,tnsnames的设置,service的设置,在考试的时候特别需要注意看清题意再做。
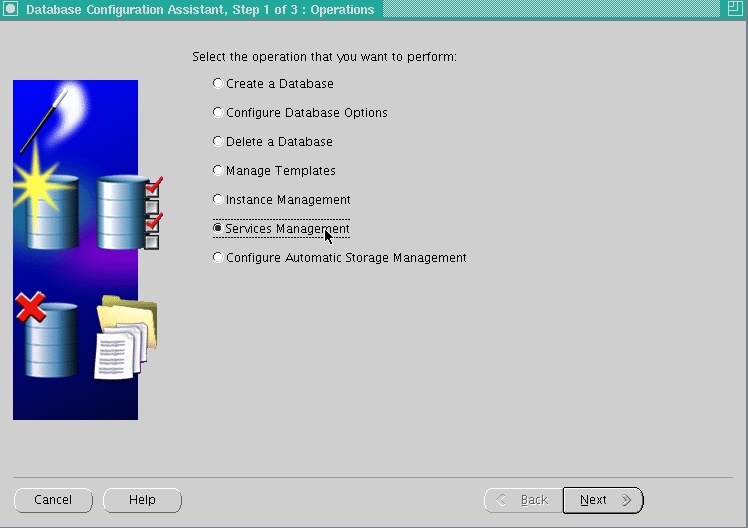
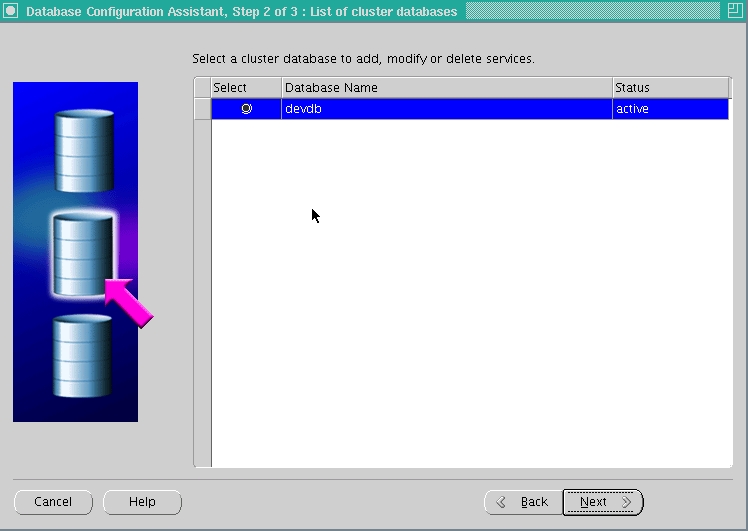
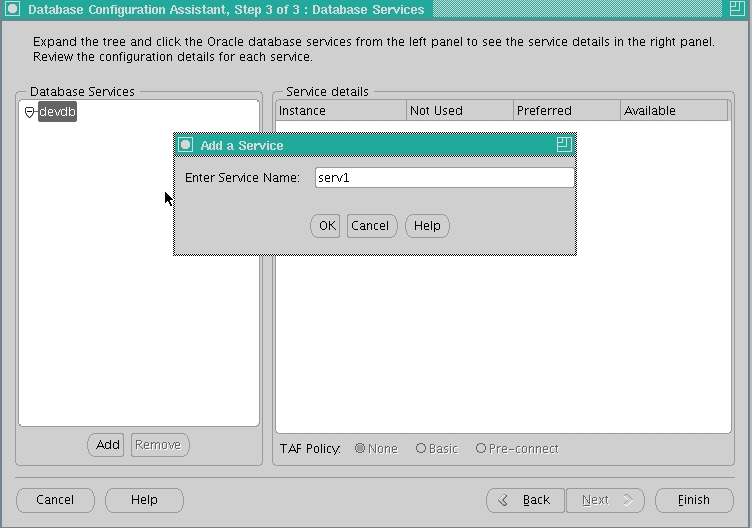
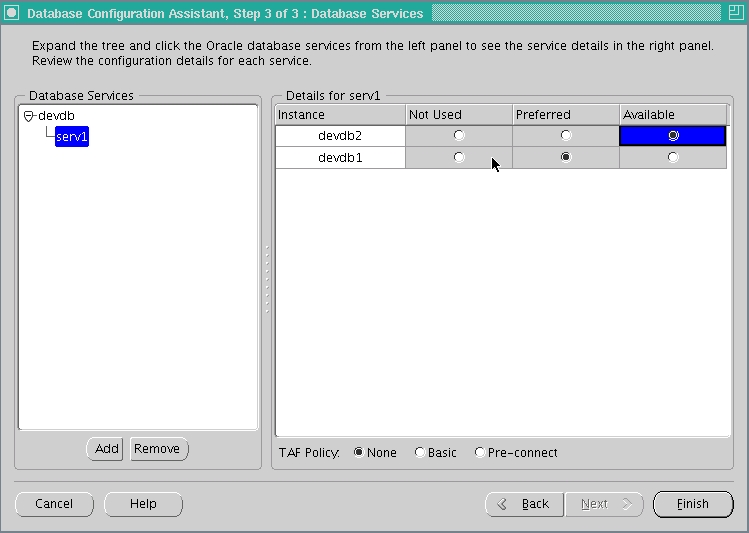
这里介绍一个rac service的增加,以节点1做available和节点2做preferred:
检查新建的service的情况:
|
1 2 3 4 5 6 7 8 9 10 11 12 13 14 15 16 17 18 19 |
ocmrac2-> crs_stat -t Name Type Target State Host ------------------------------------------------------------ ora.devdb.db application ONLINE ONLINE ocmrac1 ora....b1.inst application ONLINE ONLINE ocmrac1 ora....b2.inst application ONLINE ONLINE ocmrac2 ora....erv1.cs application ONLINE ONLINE ocmrac2 ora....db1.srv application ONLINE ONLINE ocmrac1 ora....SM1.asm application ONLINE ONLINE ocmrac1 ora....C1.lsnr application ONLINE ONLINE ocmrac1 ora....ac1.gsd application ONLINE ONLINE ocmrac1 ora....ac1.ons application ONLINE ONLINE ocmrac1 ora....ac1.vip application ONLINE ONLINE ocmrac1 ora....SM2.asm application ONLINE ONLINE ocmrac2 ora....C2.lsnr application ONLINE ONLINE ocmrac2 ora....ac2.gsd application ONLINE ONLINE ocmrac2 ora....ac2.ons application ONLINE ONLINE ocmrac2 ora....ac2.vip application ONLINE ONLINE ocmrac2 ocmrac2-> |
检查在各个节点的情况:
在节点1:
|
1 2 3 4 5 6 7 8 9 10 11 12 13 14 15 16 17 |
ocmrac1-> sqlplus "/ as sysdba" SQL*Plus: Release 10.2.0.1.0 - Production on Sat Jun 19 23:56:03 2010 Copyright (c) 1982, 2005, Oracle. All rights reserved. Connected to: Oracle Database 10g Enterprise Edition Release 10.2.0.1.0 - Production With the Partitioning, Real Application Clusters, OLAP and Data Mining options SQL> show parameter service NAME TYPE VALUE ------------------------------------ ----------- ------------------------------ service_names string devdb, serv1 SQL> |
在节点2:
|
1 2 3 4 5 6 7 8 9 10 11 12 13 14 15 16 17 |
ocmrac2-> sqlplus "/ as sysdba" SQL*Plus: Release 10.2.0.1.0 - Production on Sat Jun 19 23:56:20 2010 Copyright (c) 1982, 2005, Oracle. All rights reserved. Connected to: Oracle Database 10g Enterprise Edition Release 10.2.0.1.0 - Production With the Partitioning, Real Application Clusters, OLAP and Data Mining options SQL> show parameter service NAME TYPE VALUE ------------------------------------ ----------- ------------------------------ service_names string devdb SQL> |
测试:
杀掉节点1上的smon进程,此时数据库会自动将service转移到preferred节点:
节点2上:
|
1 2 3 4 5 6 7 8 9 10 11 12 13 14 15 16 |
ocmrac2-> sqlplus "/ as sysdba" SQL*Plus: Release 10.2.0.1.0 - Production on Sun Jun 20 00:28:57 2010 Copyright (c) 1982, 2005, Oracle. All rights reserved. Connected to: Oracle Database 10g Enterprise Edition Release 10.2.0.1.0 - Production With the Partitioning, Real Application Clusters, OLAP and Data Mining options SQL> show parameter service NAME TYPE VALUE ------------------------------------ ----------- ------------------------------ service_names string devdb, serv1 |
13条评论
主机信任机制的配置,这个有专门的脚本去执行,非常方便。
但也有人执行后ssh对等仍然失败的,手工也不行,最好不得不自己配置rsh来做。
有个陷阱,在做vipca时候,自动输入的hostname竟然不对,不是 -vip的名字,而是主机hostname,有好多人遇到这个,不小心就挂了。
service可以dbca一次性搞定
还有个人,在dbca创建asm disk group时候,按钮不能点击。那个按钮是平的,鼠标放上去,会凹下去的,环境很怪,但我点击还是没有任何问题。
最后那家伙不得不手工command line创建asm
crs_stop -all或crs_stop -f/crs_start -all重启一下
^^^^^^^^^^^^^^还是建议用crsctl start crs 或者 crsctl stop crs,好的习惯需要从10g就养成,^_^
总结的非常不错,比官方文档实用,;)
service是可以用dbca一次搞定,也可以用srvctl add service -d xxx -s xxx -r xxx -a xxxx
vipca那个确实是,如果不注意,他是默认用的-vip。还有如果节点或者IP是不连续的,输入第一个IP之后,他也会顺序增加,所以也需要手动调节一下。
谢谢二位的指点.对考试的兄弟很有帮助哈~
我也习惯用xmanager,不过培训的时候用vnc还是比较习惯的。
ricky 于 2010-07-02 @ 13:20:39 留言 :
service是可以用dbca一次搞定,也可以用srvctl add service -d xxx -s xxx -r xxx -a xxxx
vipca那个确实是,如果不注意,他是默认用的-vip。还有如果节点或者IP是不连续的,输入第一个IP之后,他也会顺序增加,所以也需要手动调节一下。
这个ip 不连续的问题说的不错!我在OU培训就是因为ip不连续,第一次安装时把环境弄废了,只好去rootdelete。
还是Ricky说的在理,OU老师的解答却是:因为/etc/hosts主机条目太多了,次序错乱的。我狂晕。
1:vnc过去肯定是图形界面,如果不是,可以找老师;
2:信任配置用他们的脚本,没事的
3:crs安装的时候,会只出现一个主机的地址,另外一个需要自己手工加进去;
4:那个创建库的地方,可能会点了以后没反应,我就死在那里了
5:整个题目中的所有东西都可以在安装的时候一次搞定
Thanks
请问为什么不用ocfs,而用raw
谢谢
请问为什么不用ocfs,而用raw, 是不是有什么限制
谢谢
[root@ocmrac1 ~]# ls -l /dev/raw/
total 0
crw-rw—- 1 oracle dba 162, 1 Jun 9 10:29 raw1
crw-rw—- 1 oracle dba 162, 2 Jun 9 10:29 raw2
crw-rw—- 1 oracle dba 162, 3 Jun 9 10:29 raw3
crw-rw—- 1 oracle dba 162, 4 Jun 9 10:29 raw4
crw-rw—- 1 oracle dba 162, 5 Jun 9 10:29 raw5
请教下,这块的权限是哪一步设置的?
fdisk 默认出来以后应该还是属于root用户, rawdevices这个文件没办法设置,是需要手工修改的吗? 还是修改 /etc/rc.d/rc.local 这个文件进行设置。
有没有要求必须使用 rawdevices ,用udev的方式可不可以?
谢谢。
re 背向天堂: 没有说必须用asmlib,用udev也可以。但是我的建议是,在10g用asmlib,在11g以上,用udev。因为当初10g的时候,大部分的文档是基于asmlib,而到11g的时候,才有很多udev的文档出来。